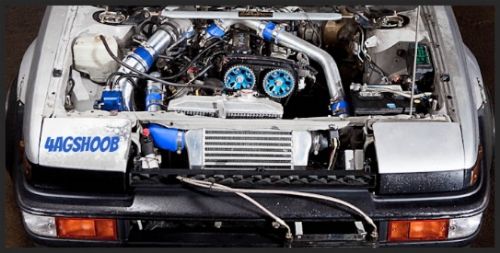
DIY: swapping an AE92 4AGZE into a zenki AE86 GT-S
DIY: swapping an AE92 4AGZE into a zenki AE86 GT-S
the time has come.....
so ive had an ae86 coupe with a 20v.....meh, ive had an ae100 sedan with GZE....meh.
ive had an ae86 with a mild build 16v bigport.....uh, got a 16v bigport carbbed.....eh, its alright for now.
but the time has come to build an ae86 with gze. the gze was the first swap ive ever done.....but it was in a FWD configuration......that was about 11-12 years ago and it was a 94' geo prizm with an aw11 gze....drove that thing to high school in 99' back before toyotas were cool, and i dont think the geo's ever caught the cool trend.
so anyway, about a month ago i drove down to nad auto and picked up an ae92 levin front cut (btw i still have the good front clip if anyone wants to do an ae92 gt-s levin front conversion). destined to be an ae86 powerplant, it sat dormant in a storage building till last week. with priority of getting the hatch daily reliable, so id have a reliable mode of transportation taking top priority, id take my test runs back and forth to the storage building. id take a few parts off the clip , adjust the carbs , go home, adjust the carbs, back to the shop, take off more parts....this went on , most of last week.
so as of friday afternoon, i had the gze free of the clip, loaded on a truck and at my house, getting tore down of all of its FWD configured parts. Saturday was spent getting the coupe in place, and prepped for its heart transplant. by saturday night i had the coupe engine hanging in the engine bay , with the exhaust header giving me problems.
sunday morning , im up at 8am , and under the hachi at 9, with an angle grinder...........bye bye exhaust. by noon , with the help of the wife the old 3 rib big ports sits on the ground with the tranny in front of the coupe. wash hands, clean up , eat lunch, grab camera.....
Last edited by 4agshoob on Mon Apr 11, 2011 1:49 pm, edited 1 time in total.
706-669-6578 EST
Re: DIY: swapping an AE92 4AGZE into a zenki AE86 GT-S
so if your reading this , im assuming you have knowledge of pulling an engine. this guide starts with both engines side by side, what needs to be swapped , modified, or converted.
right off , i want to post this link. its pretty universal to all 4ag's. and has a table of torque specs. ive never had a problem following this PDF manual.
http://opc.mr2oc.com/online_parts_catal ... ebuild.pdf
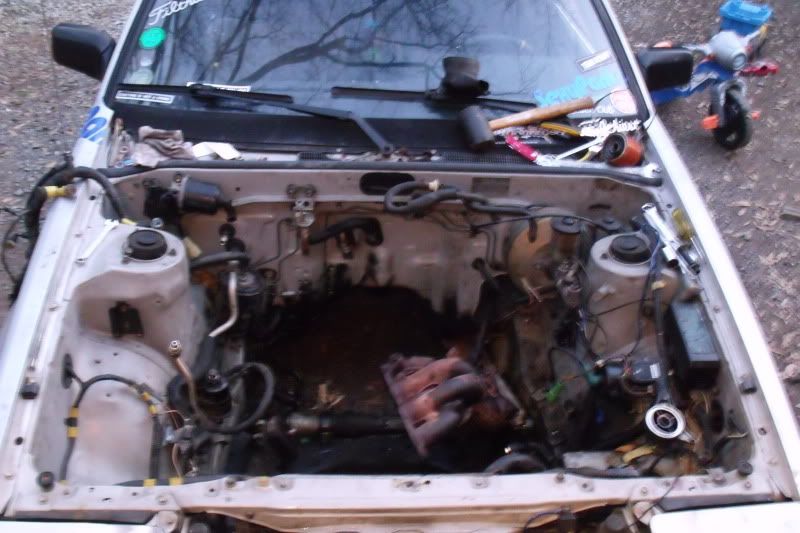
1. you should have something that looks like this.......
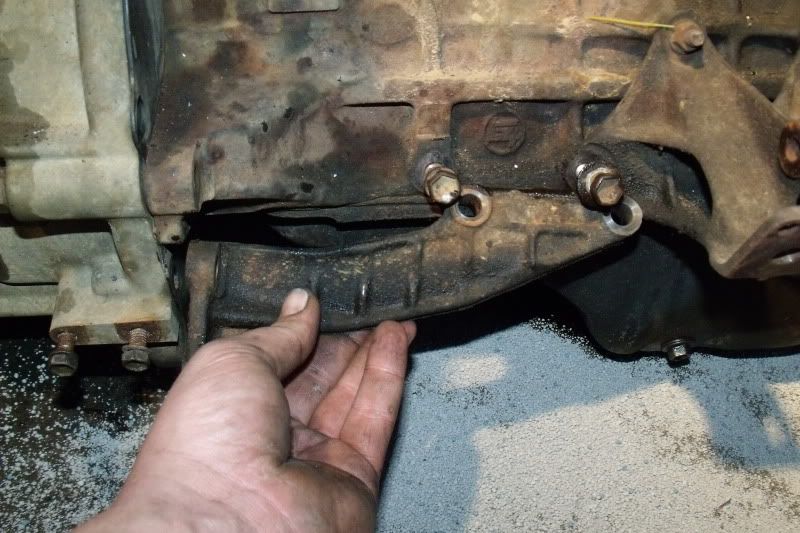
2. remove this bracket 1st. this bracket asts as a brace for the bell housing against the block.
(A)
(B)
(C)
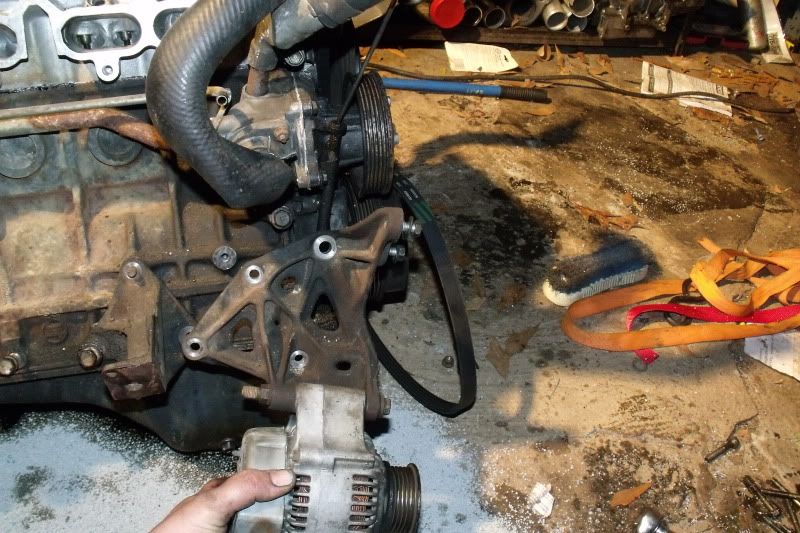
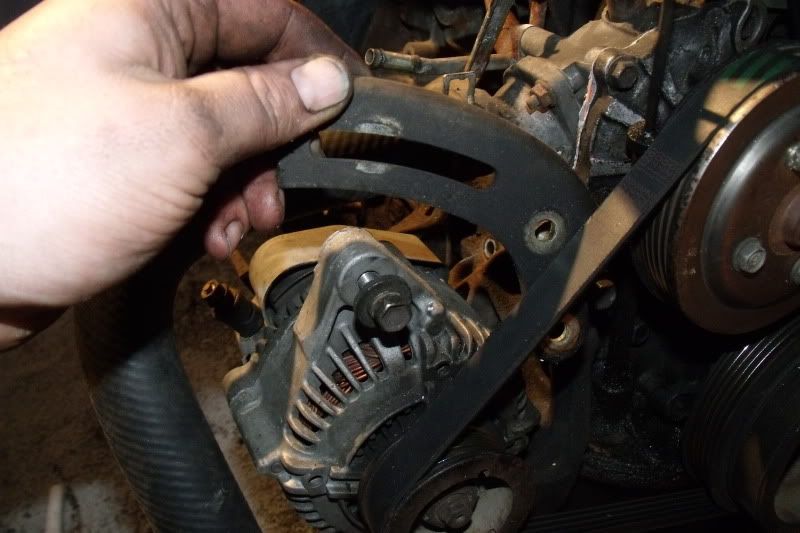
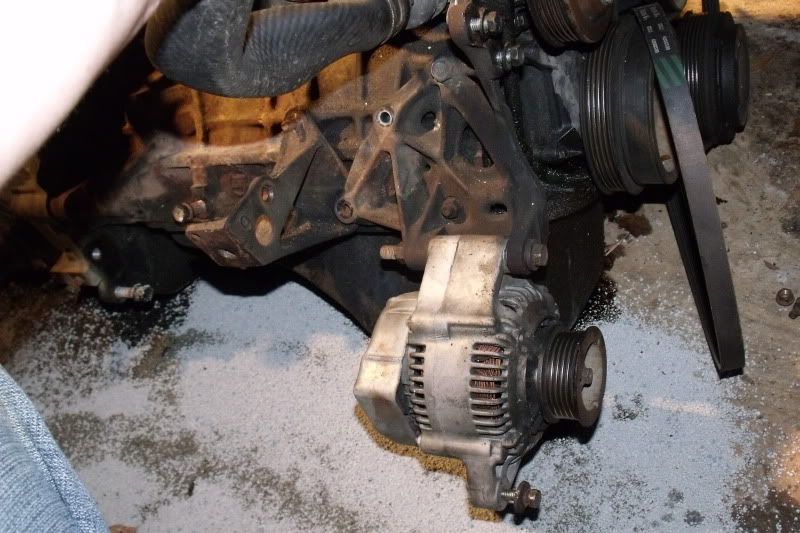
3. (A)next remove the top alternator bracket. (B)and swing the alternator down out of your way to get to the main bracket bolts. (C)remove the bolts and nuts that hold the bracket to the block. so far youve only used a 12mm and 14mm wrench, socket and ratchet.
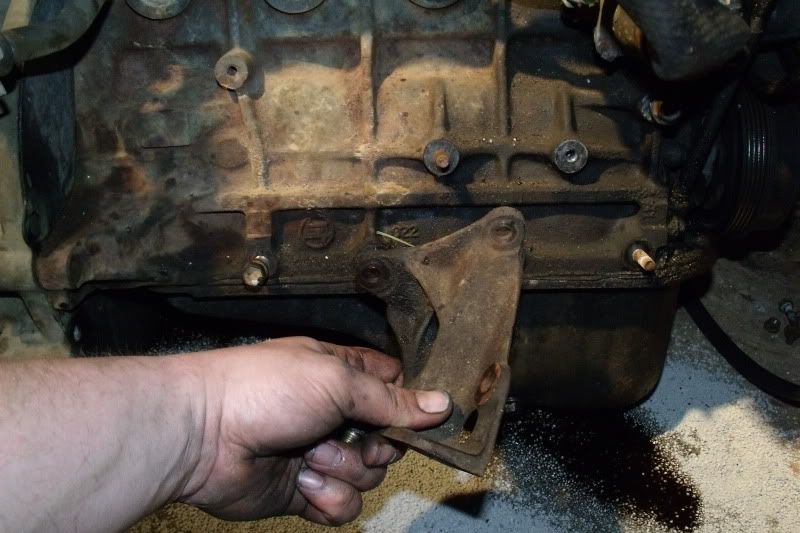
4. now that the alternator main bracket is out of your way , you can get to the passenger side motor mount, remove it.
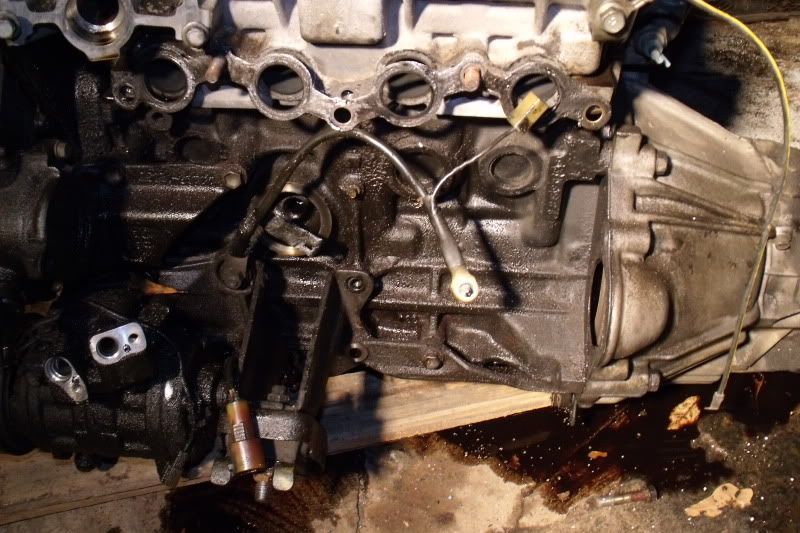
5. flip to the driver side of the engine, and remove the starter.
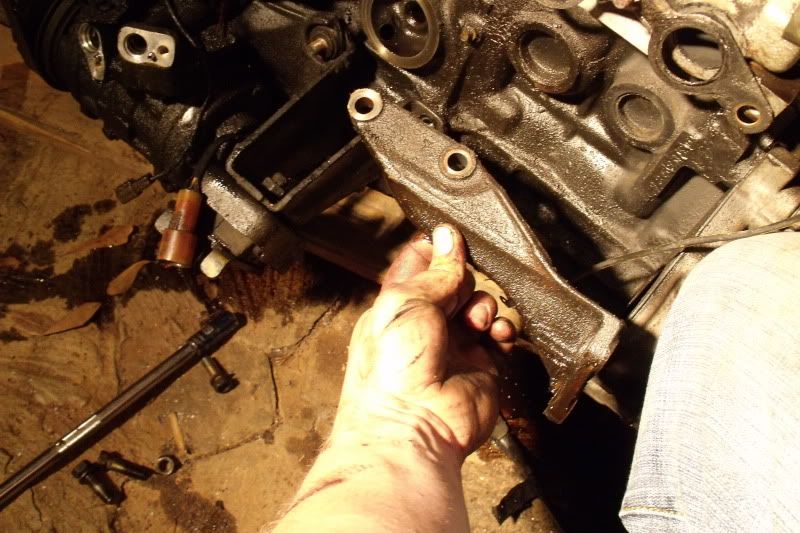
6. remove the driver side bell housing support brace.
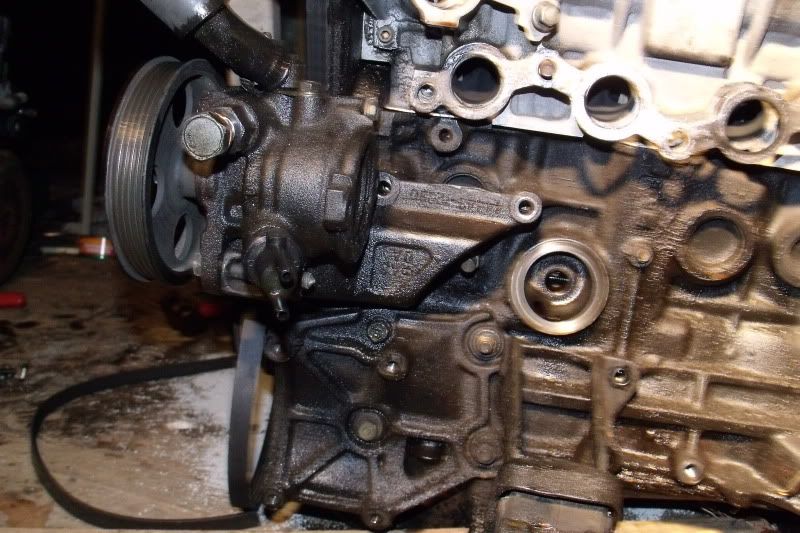
7. remove 4 12mm bolts holding the a/c compressor onto its cradle. once the a/c comp. is moved youll see the assortment of 12mm and 14mm bolts holding the driver side accessory bracket on.
(A)
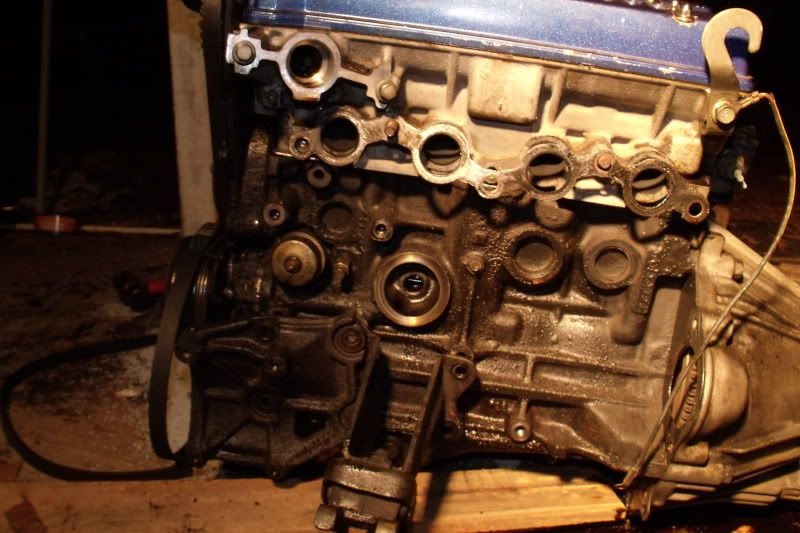
(B)
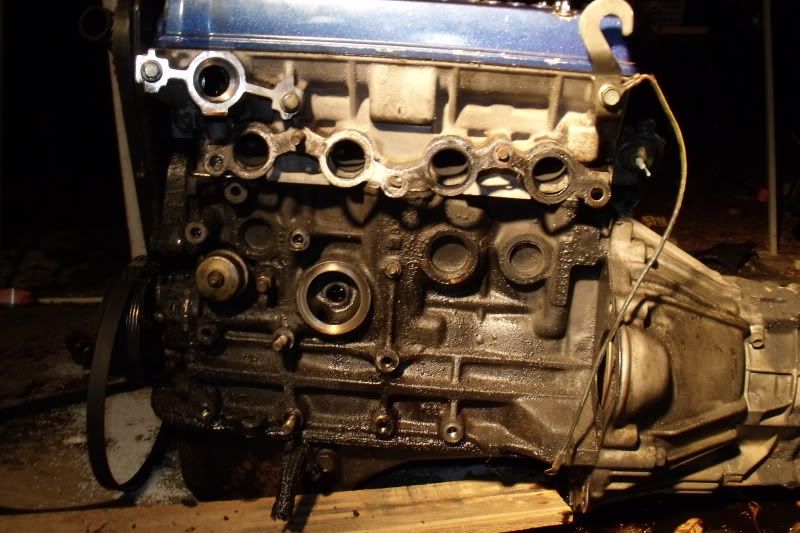
8. (A)once you remove the driver side accessory bracket, (B)the driver side engine mount bracket will slide right off.
9. remove the 4 17mm bolts holding the bell housing to the block , once these are removed you may need to use a prybar and rubber mallot to seperate the tranny from the block . remember the backing plate/dust sheild stays with the block. DO NOT strike the bell housing with a metal hammer!!! youll regret it if you do.
10. remove the 6 12mm bolts holding your clutch pressure plate to the flywheel, once bolts are out , it may take a few good taps on it , to free it from the dowel pins.
11. remove the 8 14mm flywheel bolts......yes , they are on there!!! no you wont break them.
12. remove the bell housing to block "flex plate" or "dust sheild". 2 10mm bolts.
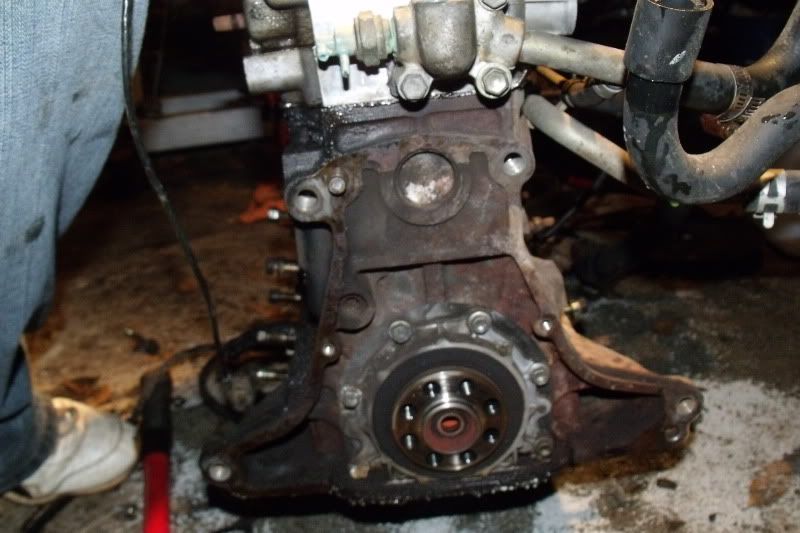
you should now be looking at this.....
right off , i want to post this link. its pretty universal to all 4ag's. and has a table of torque specs. ive never had a problem following this PDF manual.
http://opc.mr2oc.com/online_parts_catal ... ebuild.pdf

1. you should have something that looks like this.......

2. remove this bracket 1st. this bracket asts as a brace for the bell housing against the block.
(A)

(B)

(C)

3. (A)next remove the top alternator bracket. (B)and swing the alternator down out of your way to get to the main bracket bolts. (C)remove the bolts and nuts that hold the bracket to the block. so far youve only used a 12mm and 14mm wrench, socket and ratchet.

4. now that the alternator main bracket is out of your way , you can get to the passenger side motor mount, remove it.

5. flip to the driver side of the engine, and remove the starter.

6. remove the driver side bell housing support brace.

7. remove 4 12mm bolts holding the a/c compressor onto its cradle. once the a/c comp. is moved youll see the assortment of 12mm and 14mm bolts holding the driver side accessory bracket on.
(A)

(B)

8. (A)once you remove the driver side accessory bracket, (B)the driver side engine mount bracket will slide right off.
9. remove the 4 17mm bolts holding the bell housing to the block , once these are removed you may need to use a prybar and rubber mallot to seperate the tranny from the block . remember the backing plate/dust sheild stays with the block. DO NOT strike the bell housing with a metal hammer!!! youll regret it if you do.
10. remove the 6 12mm bolts holding your clutch pressure plate to the flywheel, once bolts are out , it may take a few good taps on it , to free it from the dowel pins.
11. remove the 8 14mm flywheel bolts......yes , they are on there!!! no you wont break them.
12. remove the bell housing to block "flex plate" or "dust sheild". 2 10mm bolts.

you should now be looking at this.....

706-669-6578 EST
Re: DIY: swapping an AE92 4AGZE into a zenki AE86 GT-S
your gze block.....its easier to go ahead right off the bat and pull your wiring harness from your gze. youll have to remove a few things to completely remove the harness. i didnt get pictures of this , but these things include....
intercooler
intake to TB pipe
throttle body
J-pipe from TB to S/C
intake manifold from I/C plenum
cold start injector and hose
fuel rail and injectors
fuel line
timing gear cover
throttle cable bracket
i know this seems like alot , but it actually goes pretty smoothly. and might take 30 minutes tops, but being comfortable while doing harness conversions , will make you life alot easier. it sucks to be bent over a hood of a car sorting out wiring , and can wear your back out pretty quick. ill cover the wiring conversions, later in this thread when i get there.
remove the FWD clutch, flywheel , and dust cover in the same steps as the RWD above. the gze flywheel cannot be used with the gt-s bellhousing.
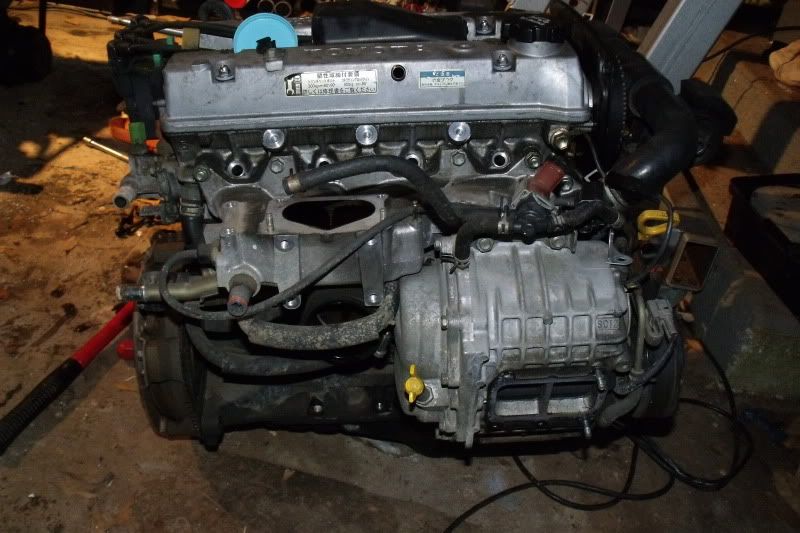
so now you have your gze minus wiring harness and some of the intake plumbing and accessories. should have something like this.......


706-669-6578 EST
Re: DIY: swapping an AE92 4AGZE into a zenki AE86 GT-S
(A)
(B)
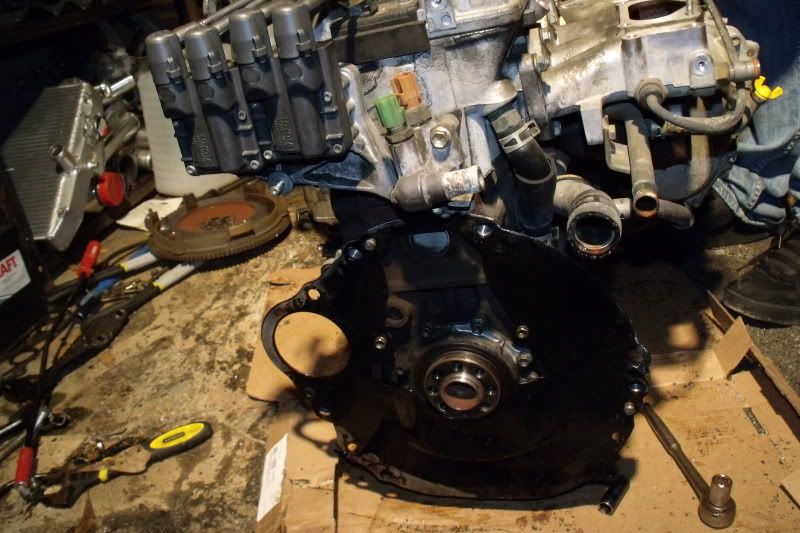
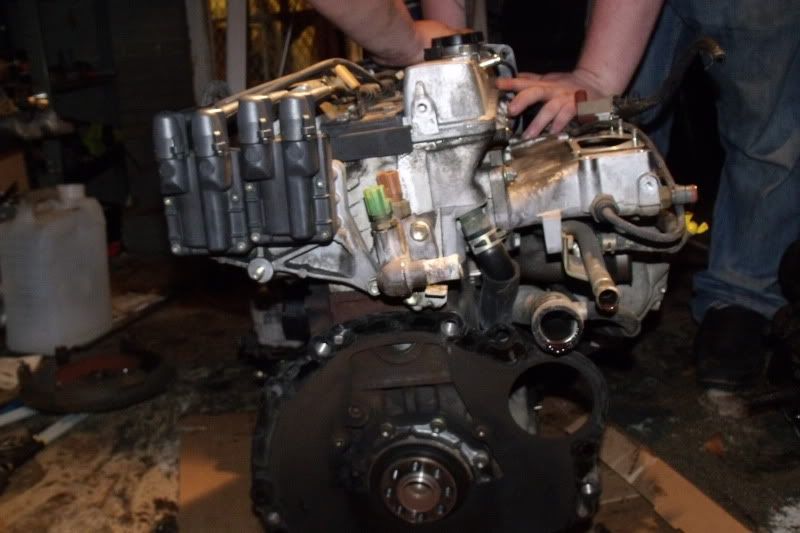
13.(A) remove the gze FWD dust cover. (B) install your RWD gt-s dust cover in its place. if the rear main seal of your new engine needs to be changed....this is the best time to do it.
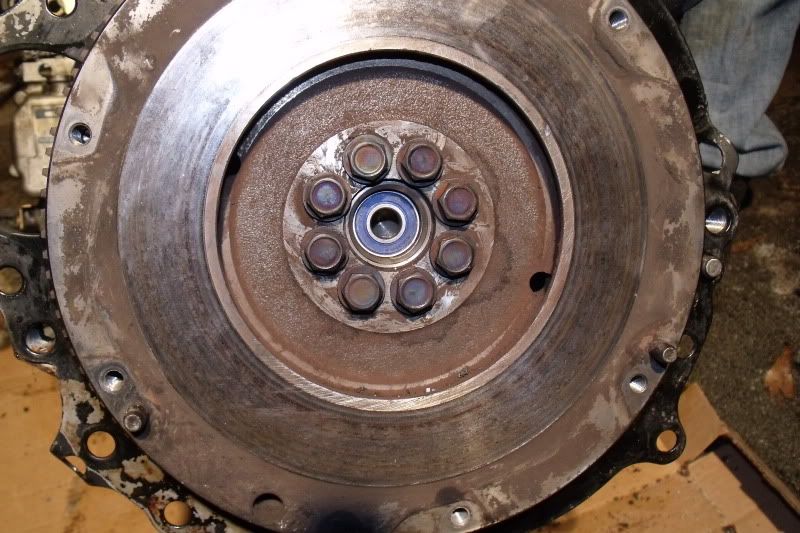
14. bolt the gt-s 3 rib flywheel onto the gze crank. these bolts are to be torqued down to 54 ft.lbs. in a star/criss cross patern like lugnuts on a wheel. using the back end(ratchet side) of an 11/16ths socket, hold the pilot bearing in place and gently tap the socket with a rubber mallot to seat the pilot bearing into the crank. youll know when your there.
(A)
(B)
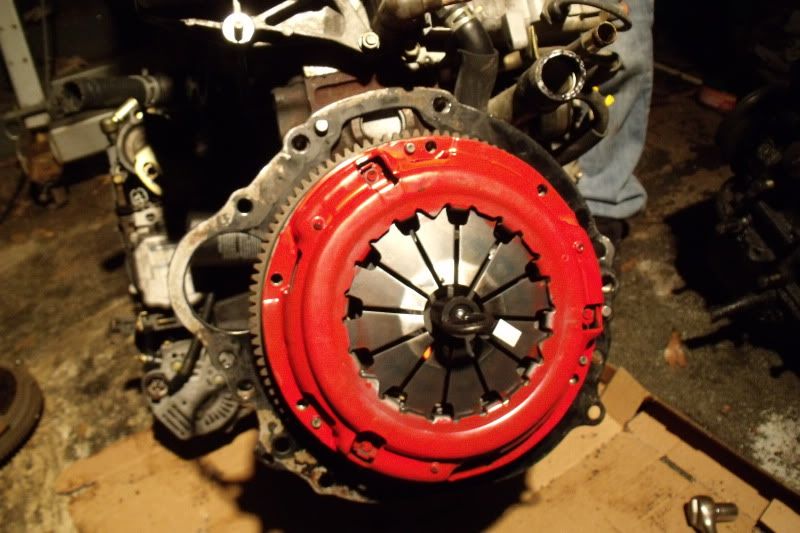
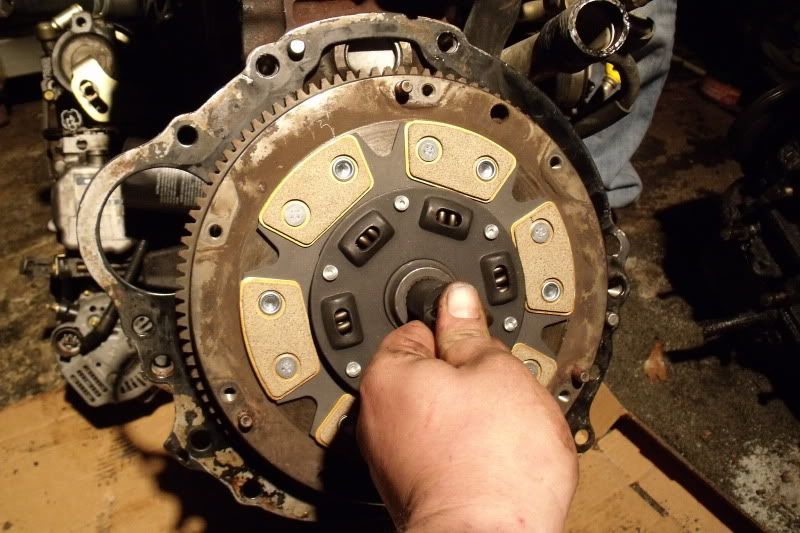
15. (A)using your pilot tool , that comes with just about every clutch kit (if not, 7/8" 21 spline from auto parts store) slide the clutch plate onto it , then center the nipple into the pilot bearing.(B) align pressure plate with dowel pins and bolt holes. finger thread the 6 12mm bolts back into their places. these bolts are supposed to be torqued at 47 ft.lbs. and also tightened in a star pattern like lugnuts on a wheel.

(B)

13.(A) remove the gze FWD dust cover. (B) install your RWD gt-s dust cover in its place. if the rear main seal of your new engine needs to be changed....this is the best time to do it.

14. bolt the gt-s 3 rib flywheel onto the gze crank. these bolts are to be torqued down to 54 ft.lbs. in a star/criss cross patern like lugnuts on a wheel. using the back end(ratchet side) of an 11/16ths socket, hold the pilot bearing in place and gently tap the socket with a rubber mallot to seat the pilot bearing into the crank. youll know when your there.
(A)

(B)

15. (A)using your pilot tool , that comes with just about every clutch kit (if not, 7/8" 21 spline from auto parts store) slide the clutch plate onto it , then center the nipple into the pilot bearing.(B) align pressure plate with dowel pins and bolt holes. finger thread the 6 12mm bolts back into their places. these bolts are supposed to be torqued at 47 ft.lbs. and also tightened in a star pattern like lugnuts on a wheel.

706-669-6578 EST
Re: DIY: swapping an AE92 4AGZE into a zenki AE86 GT-S
okay in this next part im gonna cover coolant plumbing. at first it will seem overwhelming , but the stock ae92 gze comes with everything needed , with the exception of a single NPT fitting that is $1.00 at your local hardware store, to make the water flow rwd ready. Its almost like toyota planned it this way. other than that i used the original hoses, most clamps , and piping that was there , and also the original thermostat housing ,water pump and water necks. after all , this swap is on a budget.
(A)
(B)
(C)
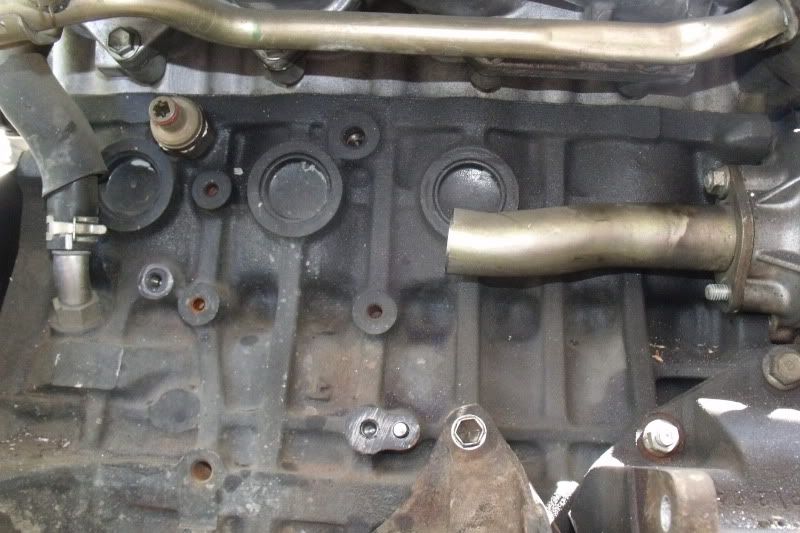
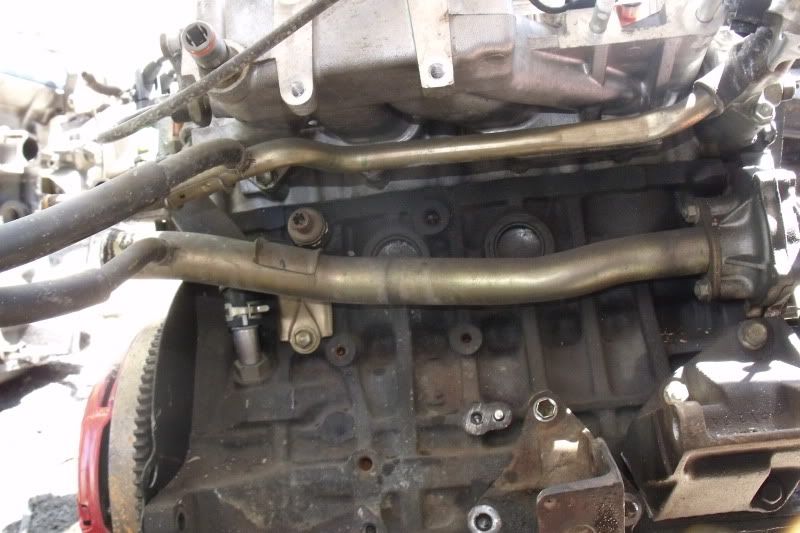
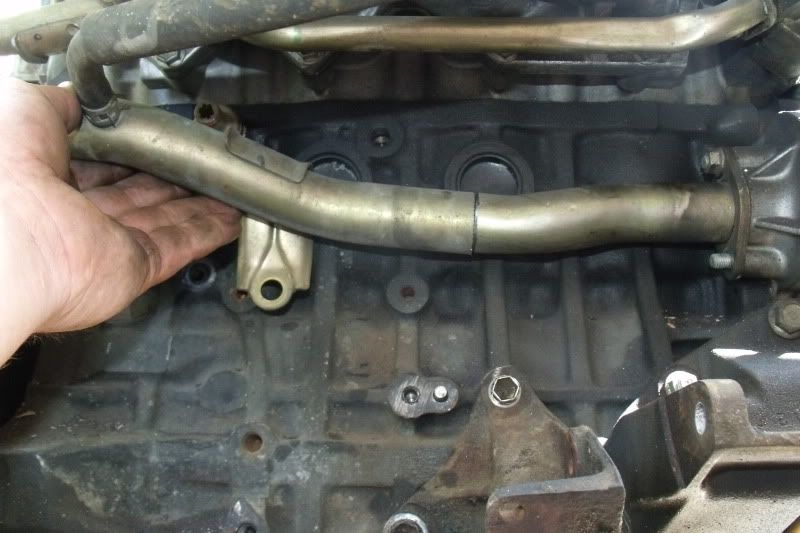
16. (A)you start out , by removing th s/c....2 top bolts , and a bottom "pin" bolt. after removing the s/c you have this in front of you.
(B) remove the larger bottom pipe , its held on with 2 12mm bolts.
(C)cut the pipe off at about this length. then use a thin layer of permatex when re-installing the pipe....theres no gasket there from the factory(odd)
(A)
(B)
(C)
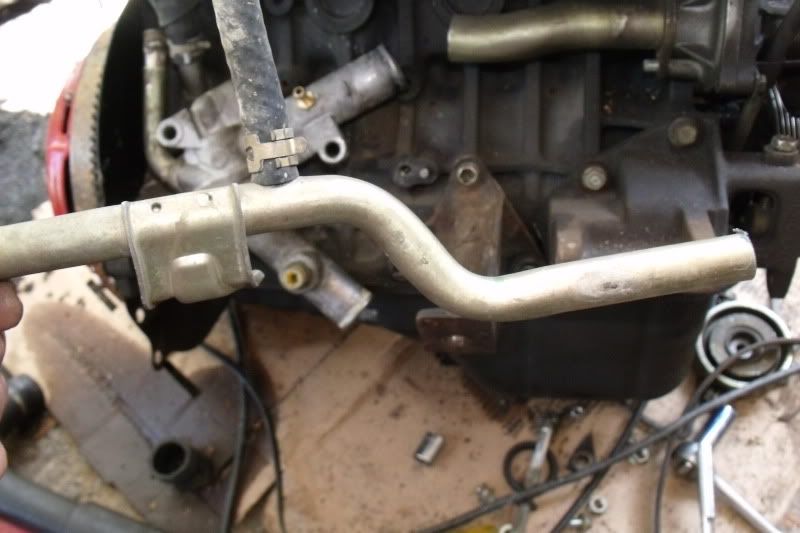
(D)
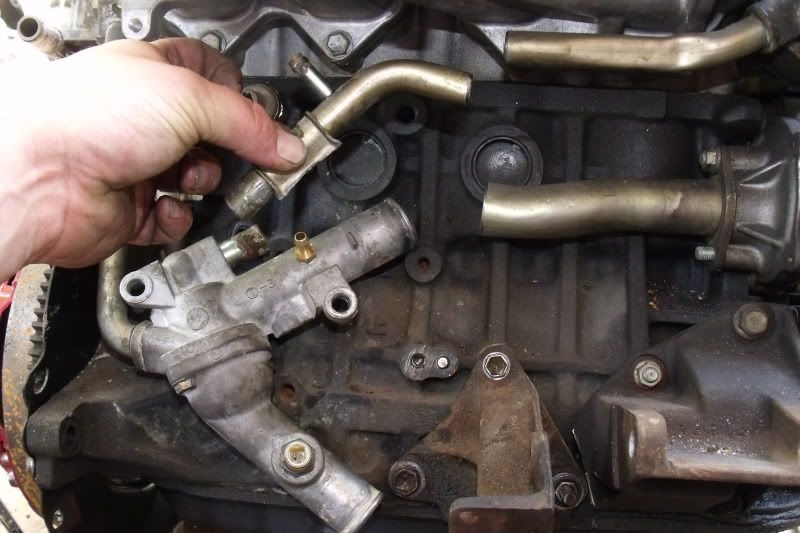
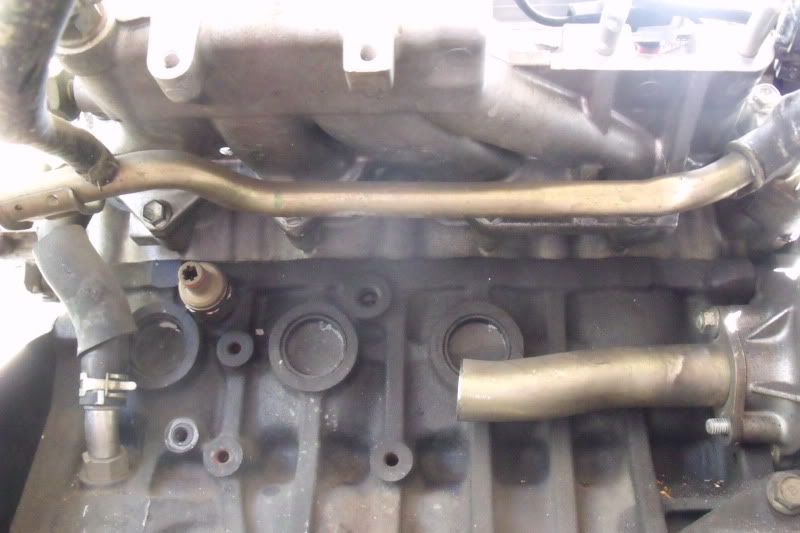
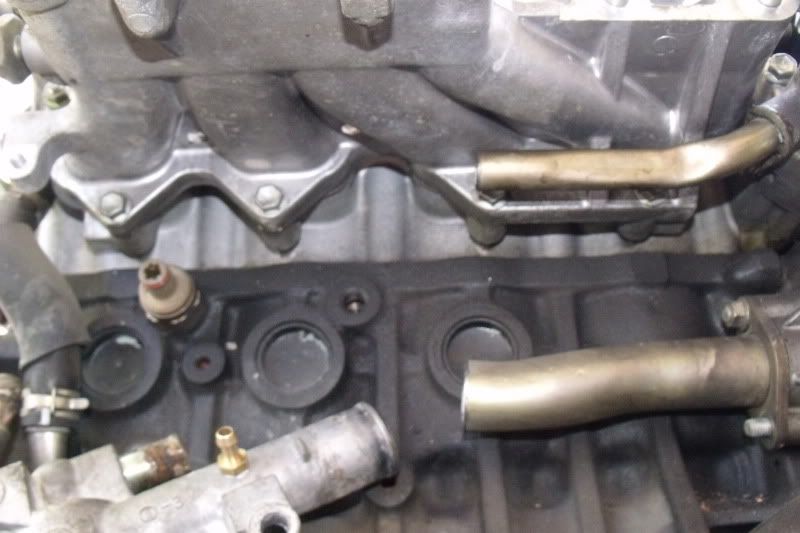
17. (A) now we move onto the smaller diameter upper pipe. held to the intake manifold with a 12mm olt , and to the waterneck with a 10mm bolt.
(B) cut this pipe , about here, or a little longer. this pipe has a small rubber o-ring that goes into the fitting at the water neck, go ahead and replace it when you fit the pipe back.
(C) now looking at the piece you cut off........
(D)cut it to look like the photo, and remove the old mounting bracket flange.
(A)
(B)
(C)
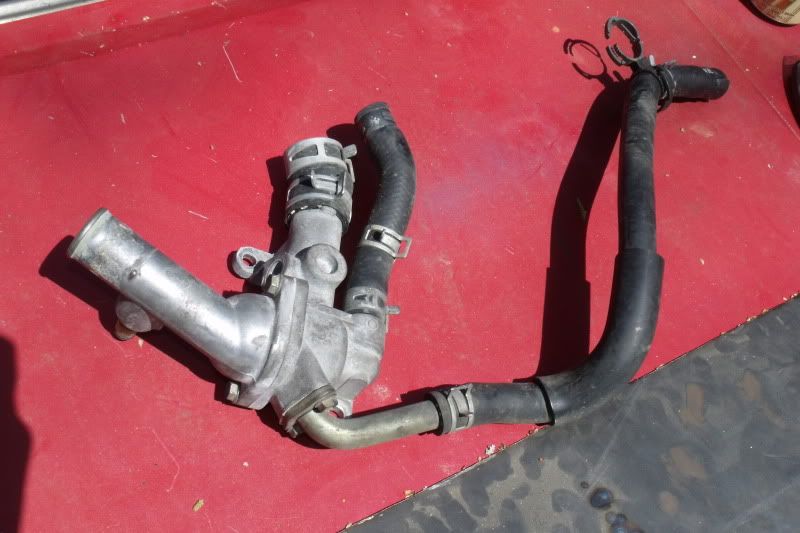
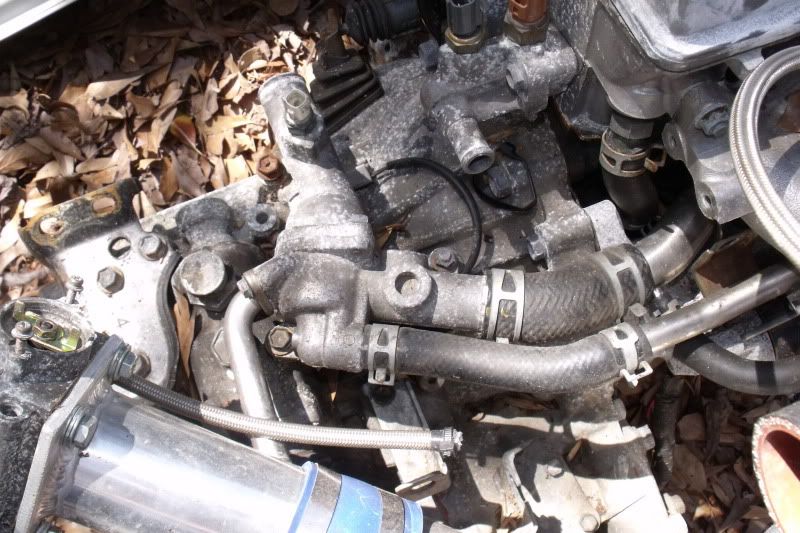
19. (A) this is what the factory location of the ae series gze thermostat housing looks like.
(B) removed from fwd tranny....remove these 2 bolts.
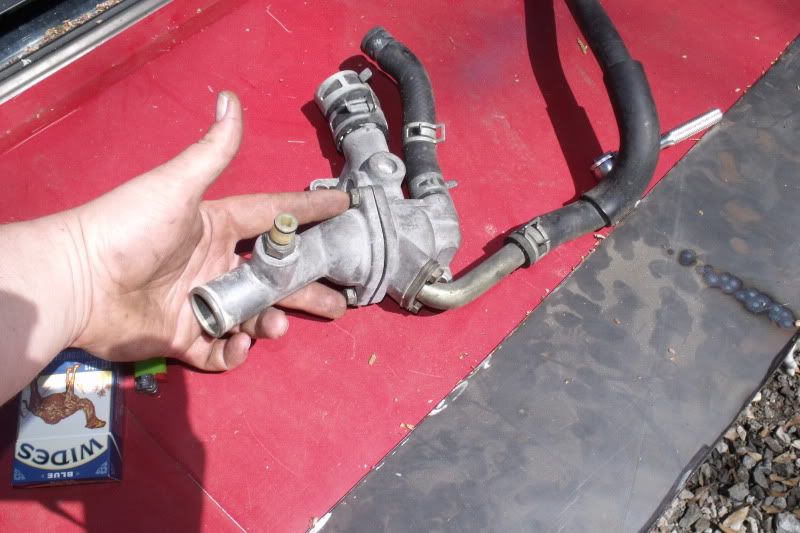
(C)flip the housing , and bolt back together...replace your thermostat while your there.
(A)
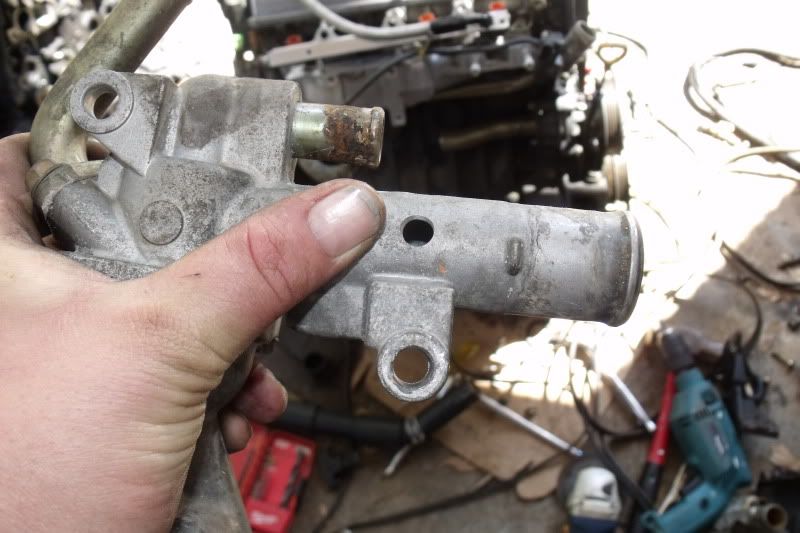
(B)
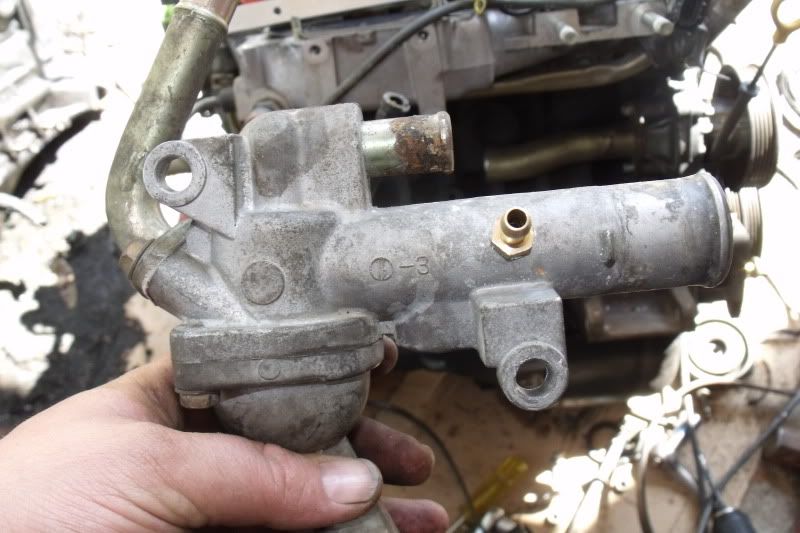
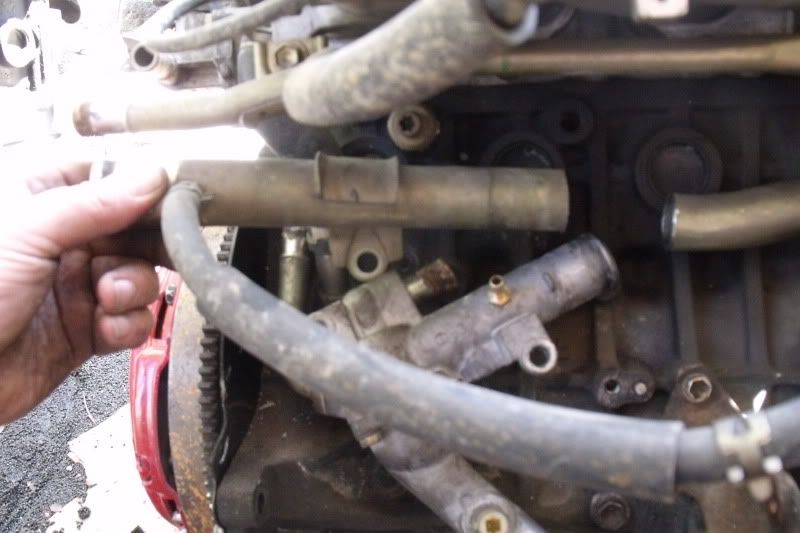
(C)
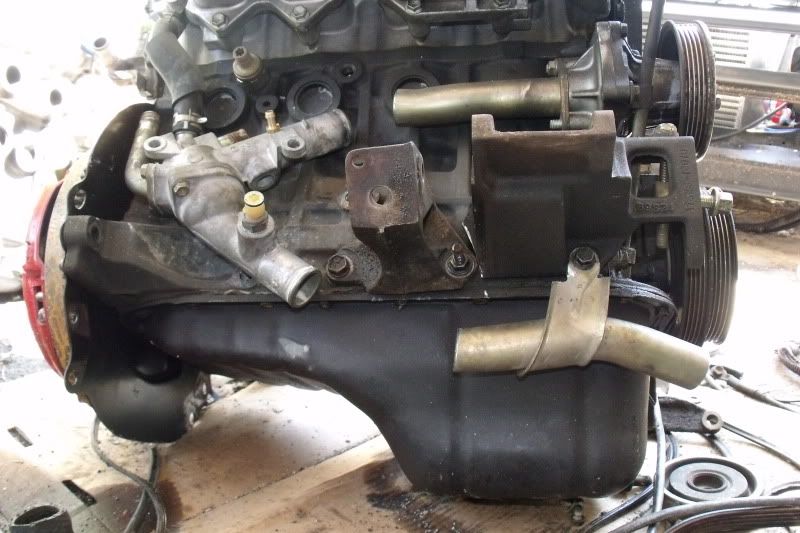
20. (A) go to your local hardware store and get a 1/4" npt barbed fitting. drill a corresponding whole in the long water neck on the thermostat housing.
(B)thread NPT fitting into whole , be sure to use teflon tape. this will serve as the coolant passage to the IACV onthe gze intake , we removed this factory passage on the larger coolant pipe earlier by cutting the pipe.
(C) remember the larger pipe section we cut off first? cut off the end , right behind the nipple eliminating the nipple that previously fed the IACV, and bolt here.
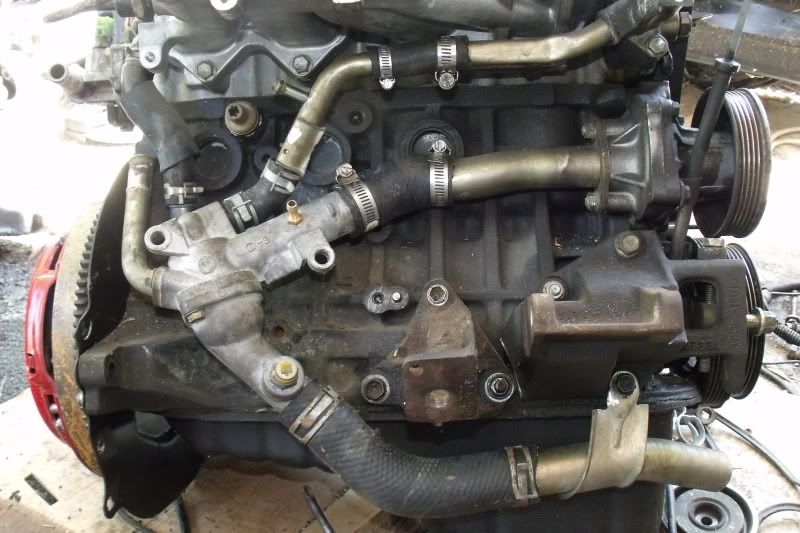
now using the factory hoses from the FWD setup engine, cut the correct bends and hose sizes to connect all the pipes to look like this below......and you now have your thermostat , heater core inlets and outlets , and a functioning cooling system.
(A)

(B)

(C)

16. (A)you start out , by removing th s/c....2 top bolts , and a bottom "pin" bolt. after removing the s/c you have this in front of you.
(B) remove the larger bottom pipe , its held on with 2 12mm bolts.
(C)cut the pipe off at about this length. then use a thin layer of permatex when re-installing the pipe....theres no gasket there from the factory(odd)
(A)

(B)

(C)

(D)

17. (A) now we move onto the smaller diameter upper pipe. held to the intake manifold with a 12mm olt , and to the waterneck with a 10mm bolt.
(B) cut this pipe , about here, or a little longer. this pipe has a small rubber o-ring that goes into the fitting at the water neck, go ahead and replace it when you fit the pipe back.
(C) now looking at the piece you cut off........
(D)cut it to look like the photo, and remove the old mounting bracket flange.
(A)

(B)

(C)

19. (A) this is what the factory location of the ae series gze thermostat housing looks like.
(B) removed from fwd tranny....remove these 2 bolts.
(C)flip the housing , and bolt back together...replace your thermostat while your there.
(A)

(B)


(C)

20. (A) go to your local hardware store and get a 1/4" npt barbed fitting. drill a corresponding whole in the long water neck on the thermostat housing.
(B)thread NPT fitting into whole , be sure to use teflon tape. this will serve as the coolant passage to the IACV onthe gze intake , we removed this factory passage on the larger coolant pipe earlier by cutting the pipe.
(C) remember the larger pipe section we cut off first? cut off the end , right behind the nipple eliminating the nipple that previously fed the IACV, and bolt here.
now using the factory hoses from the FWD setup engine, cut the correct bends and hose sizes to connect all the pipes to look like this below......and you now have your thermostat , heater core inlets and outlets , and a functioning cooling system.


706-669-6578 EST
Re: DIY: swapping an AE92 4AGZE into a zenki AE86 GT-S
(A)
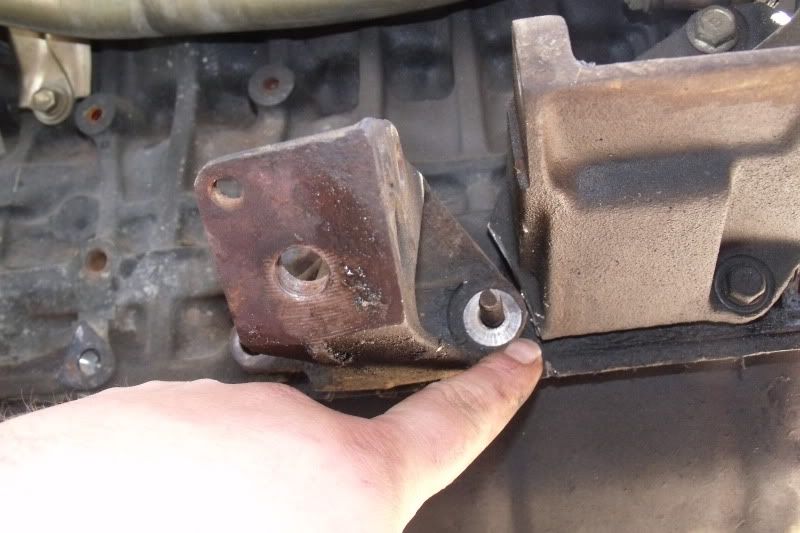
21. (A) theres a small flange on the s/c carrier bracket that needs to be removed to fit the rwd engine mount. dont worry about cutting this , the metal toyota used to make these hanger brackets should have been sold as armor on an m1 abrams tank!!! ****s solid!!! after cutting this little tab off , the motor mount falls right into place...bolt it on.....oh yeah side note , theres a dowel pin in the block you will need to remove, needle nose vise grips and its out in a few twist.

21. (A) theres a small flange on the s/c carrier bracket that needs to be removed to fit the rwd engine mount. dont worry about cutting this , the metal toyota used to make these hanger brackets should have been sold as armor on an m1 abrams tank!!! ****s solid!!! after cutting this little tab off , the motor mount falls right into place...bolt it on.....oh yeah side note , theres a dowel pin in the block you will need to remove, needle nose vise grips and its out in a few twist.

706-669-6578 EST
Re: DIY: swapping an AE92 4AGZE into a zenki AE86 GT-S
next , mount your rwd exhaust manifold....
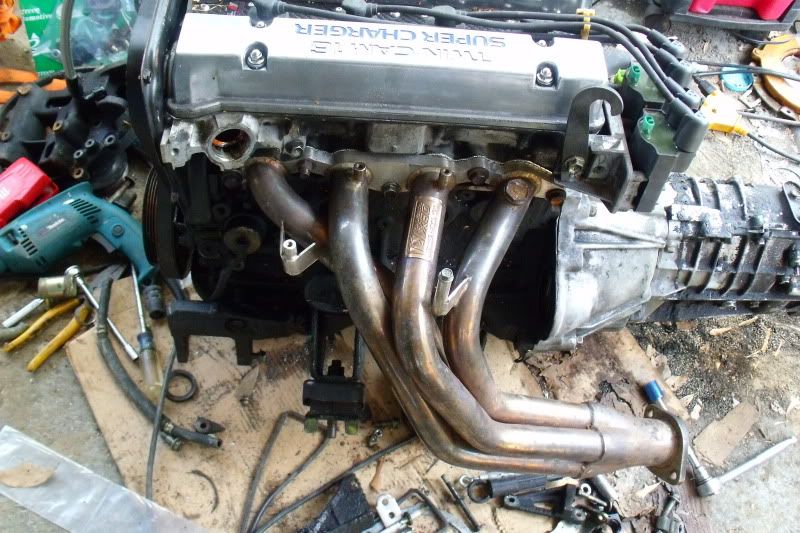
then your transmission.....
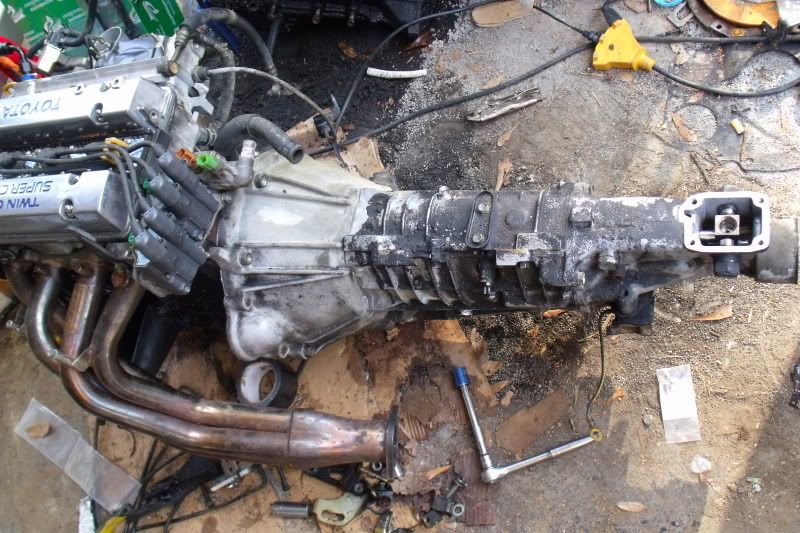
didnt get pictures, but install your starter. installation is opposite of removal. also install the bell housing support brackets on both side of the block, as well installation is opposite of removal. for ease of work, go ahead and attach the starter main power wire, and switch wire , because when installed on the engine these wires are on the back of the starter motor.
also this is the ideal time to install your motor mounts.i recommend cusco or megan beings that the gze produces gobbs more torque, you want a stifferengine mount. the tranny mount is also an ease to get to at this stage.

then your transmission.....

didnt get pictures, but install your starter. installation is opposite of removal. also install the bell housing support brackets on both side of the block, as well installation is opposite of removal. for ease of work, go ahead and attach the starter main power wire, and switch wire , because when installed on the engine these wires are on the back of the starter motor.
also this is the ideal time to install your motor mounts.i recommend cusco or megan beings that the gze produces gobbs more torque, you want a stifferengine mount. the tranny mount is also an ease to get to at this stage.

706-669-6578 EST
Re: DIY: swapping an AE92 4AGZE into a zenki AE86 GT-S
lets start the ever intimidating "HARNESS".....[cue dracula music]
first i must post these links , they are ever so helpful in this:
http://club4ag.com/technical_main.htm (4agze ae101/ae92 ecu pinouts) this will give you reference to what abreviasions stand for.
http://forums.club4ag.com/zerothread?id=76514 this guy clears alot of things up as well.
the basics of a toyota harness is this....
blk/red wires -usually these are main 12v supply constants to almost all remote sensors ie: ont he 4agze they go to things like the s/c clutch, vsv's, cts, ecu, clod start inj. and some accesory's , etc. this wire is energized in the "on" position of the ignition.
blk/orn wires- main 12v constant switched with ignition for injectors , coils, etc. this wire is energized in the "on" position in the ignition.
thick blk/wht wires- is a switched 12v signal wire only live when the ignition is is in the "start" position. it feeds juice to the starter sylinoid , STA on the ecu, etc.
thick wht wires -always associated with the battery direct and charging systems.
yel/blk wire - on the chassis side is almost always oil pressure to your cluster
yel/grn wire - on the chassis side is almost always water temp to your cluster
when dealing with the body/chassis lighting:
green wire - positve 12v
wht/blk - ground/ sometimes a switched ground.
seriously , you couldnt choose an easier chassis to swap an engine into. why you ask? a few simple reasons....
-that electronic speed sending unit for the more modern engines..............your tranny is cable driven right to the speedo=]
-tight fit...............yeah right not in ae86
-motor mounts........sure , what do you put in there?
-that newer model engine with the mystery split wires from the alt. and charging system.......your ae86 charging system is part of the chassis.
-relays for fuel pump, circuit opening relays, etc................yeah theyre part of the ae86 chassis already, just tap into them.
-stretching that harness to fit......nope with umpteen wholes in the firewall, where you wanna run it through?
so ill start with the simplest things and work from there....
1st off, when swapping to a gze, your alternator is going to be on the other side of the engine bay. you look at your engine bay and you see this harness stretched across the radiator core support , and you think "hmmmmm.....this is gonna SUCK!!" slow down, its actually a cake walk.
(A)
(B)
(C)
(D)
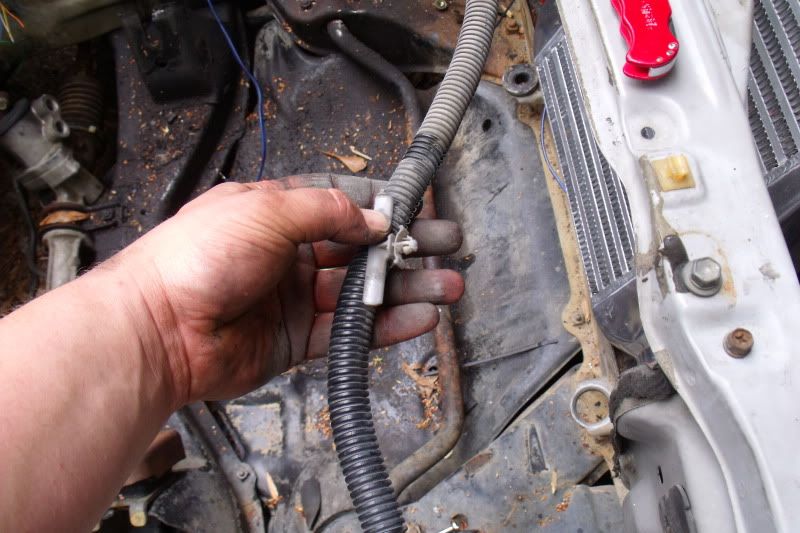
(E)
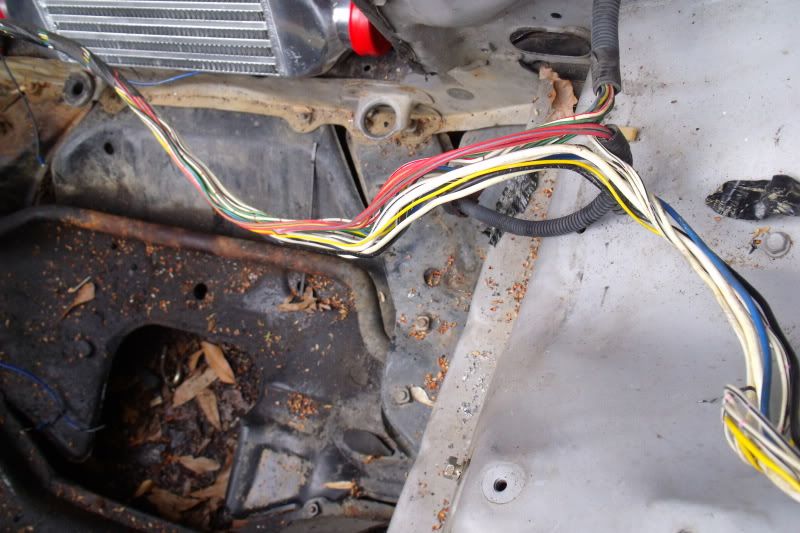
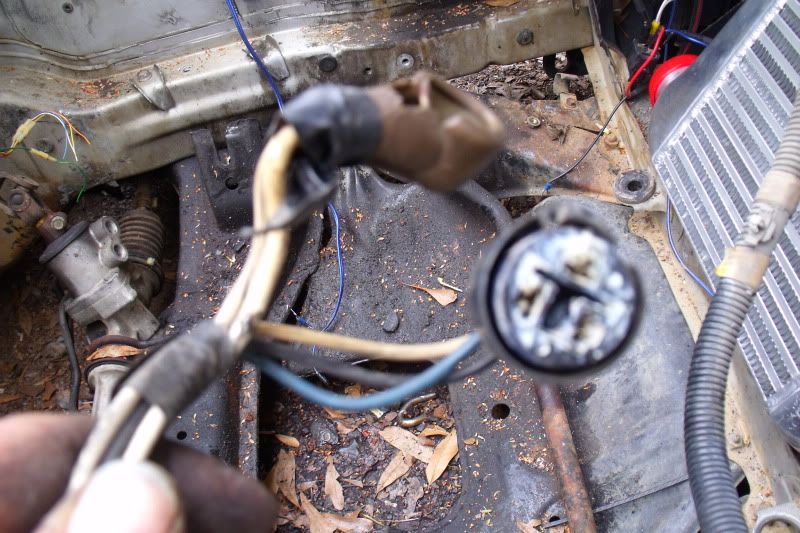
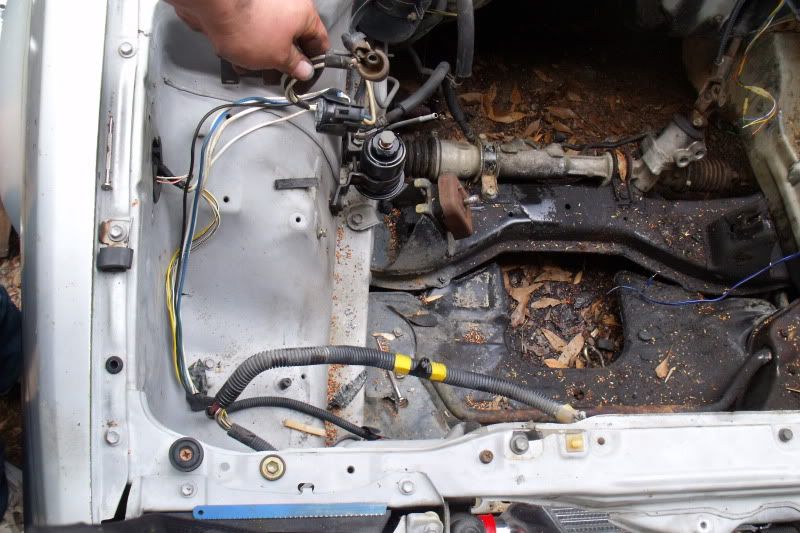
23. (A) you atart with this plug on the passenger side of the chassis.
(B) remove the crusty old electrical tape, and looming cover
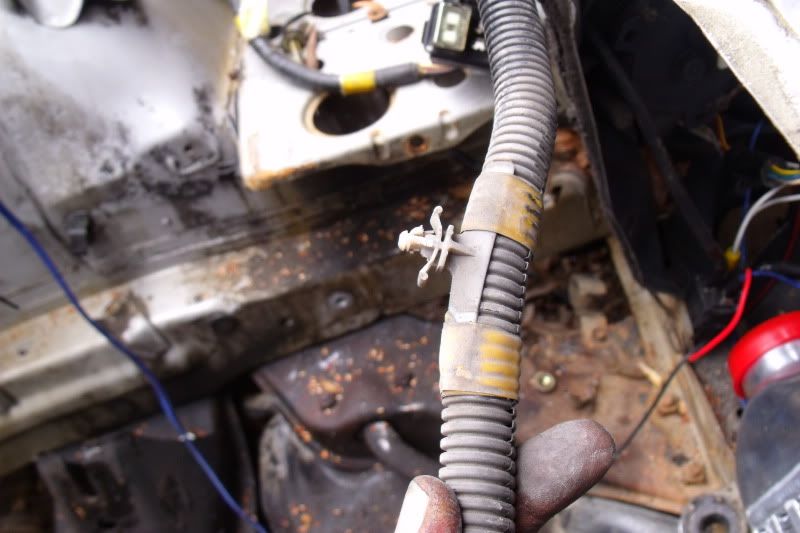
(C)(D)further remove the chassis clips that hold the harness to the car, save these, youll need them later.
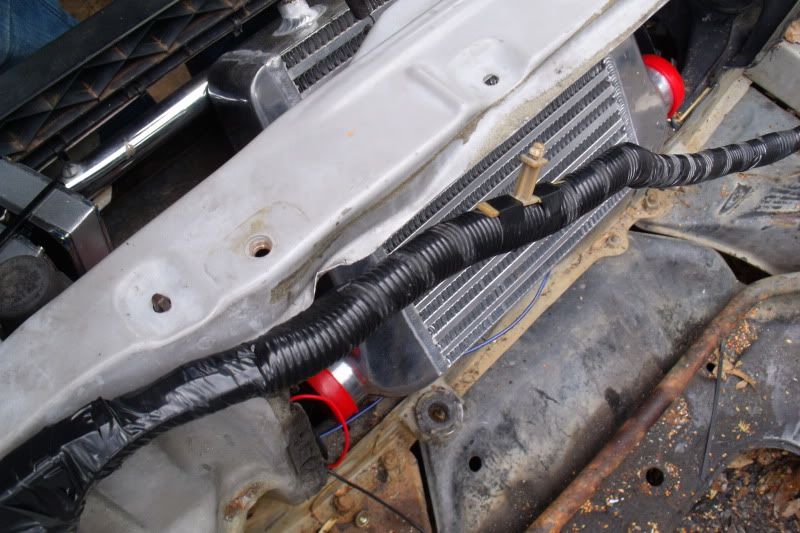
(E) continue unwrapping the looming, and removing clips across the whole radiator core support , to the other side of the car , including the "L" shaped harness jacket , that mounts to the core support.
(A)
(B)
(C)
(D)
(E)
(F)
(G)
(H)
(I)
(J)
(K)
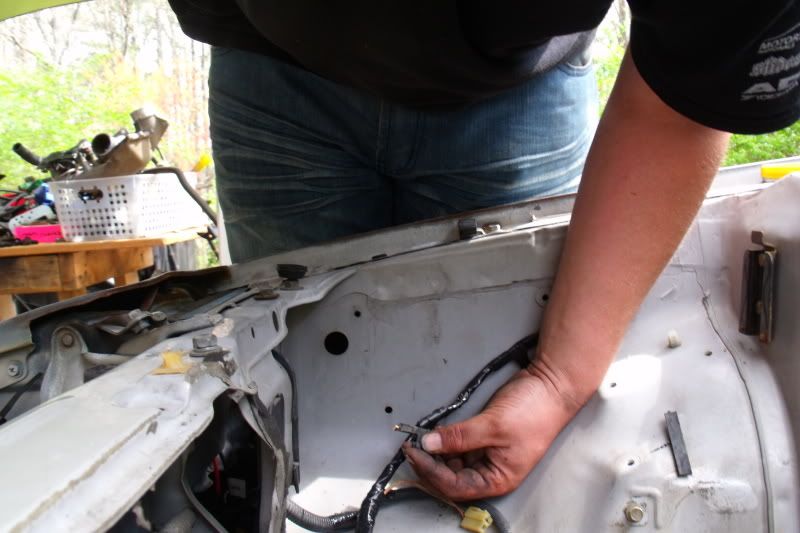
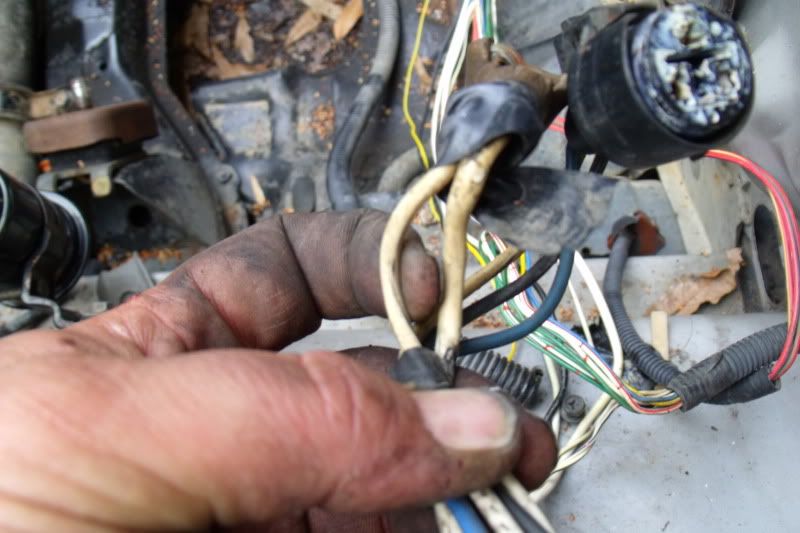
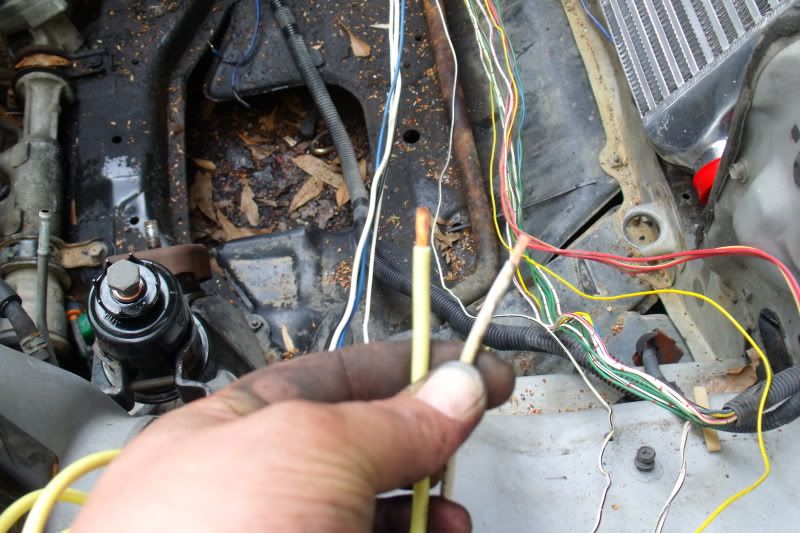
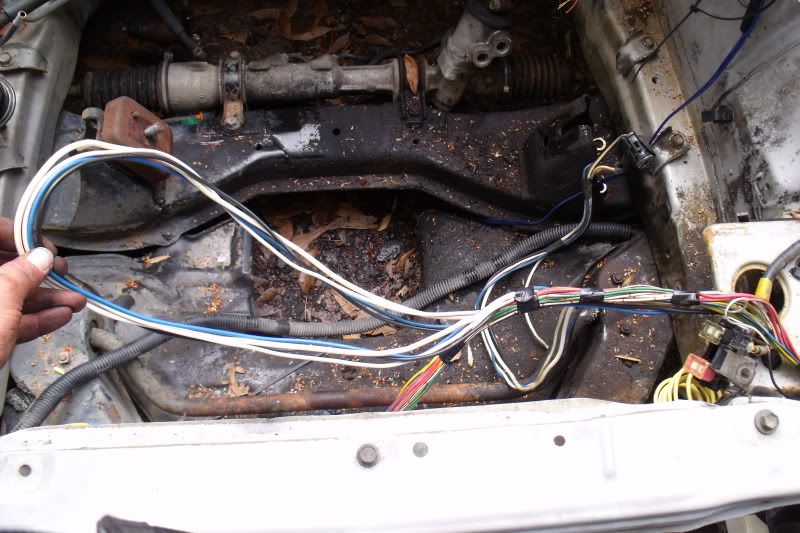
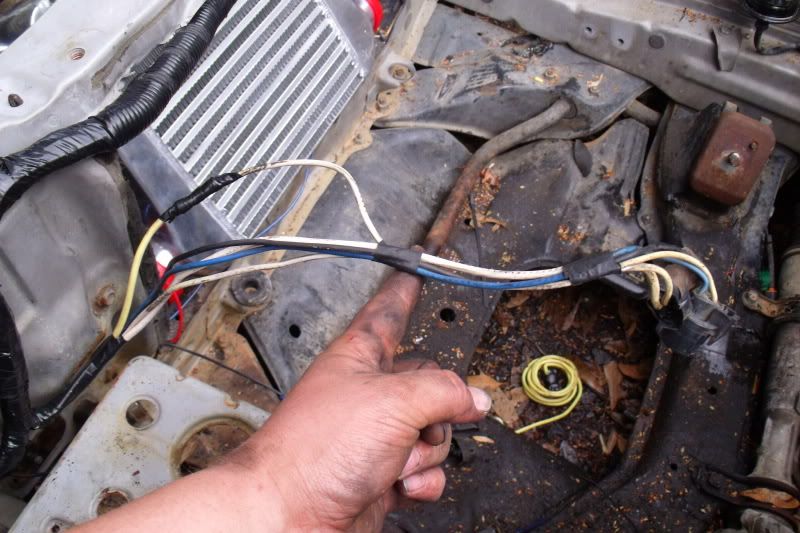
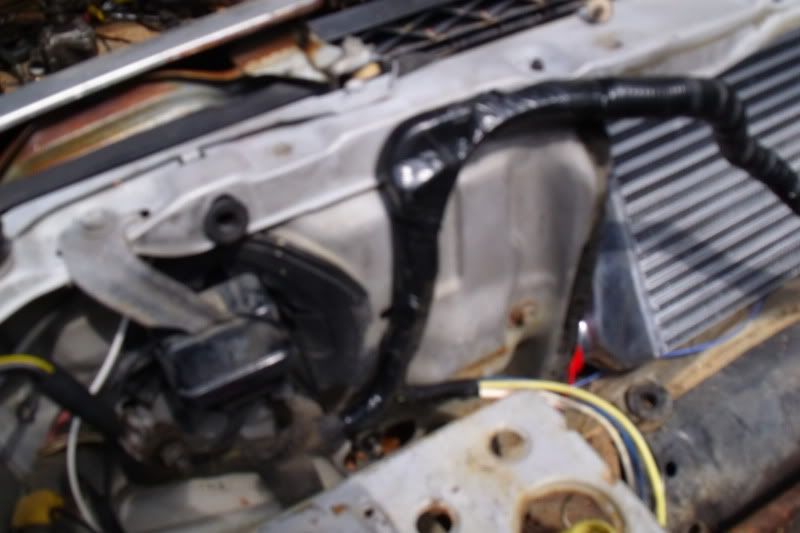
24. (A) note the smaller white wire (12 ga.) on the left side of my finger, this wire runs through the fender well, and not back to the fuse box. cut this wire , with reasonable length to add wire on to. (4-5")
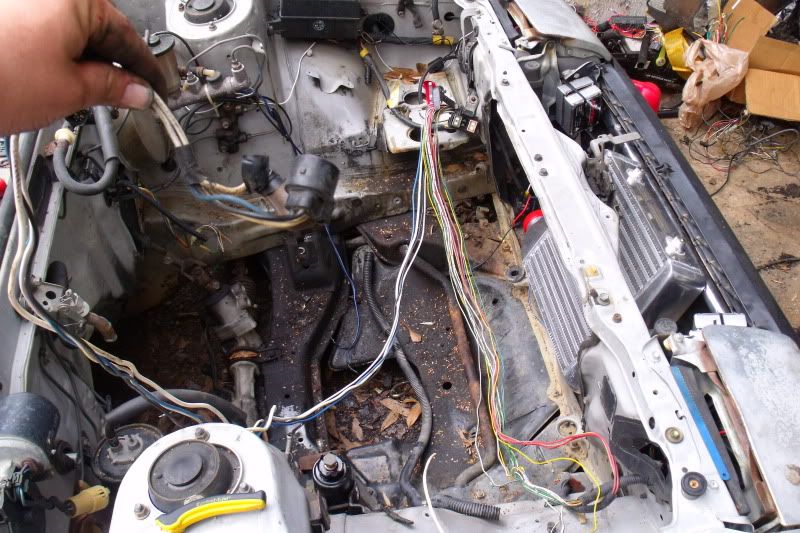
(B)once that single wire is cut loose you can basically see the simplicity of how the other charge wires are ran back to the other side of the car near the fuse box. throw these wires towards the driver side of the car, and leave them.
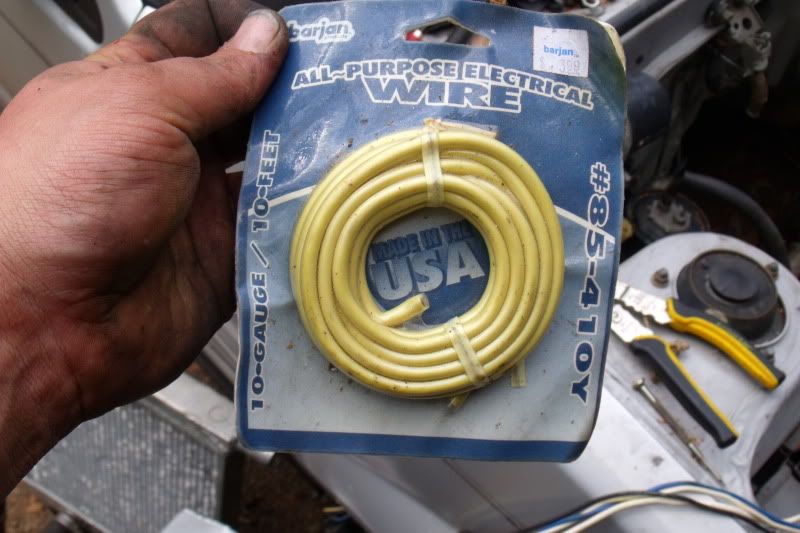
(C) althought the wire is 12 gauge on the car , ill be running 10 gauge wire to help compensate the distance ill be extending this wire to the other side.
(D)strip the wire back on the original chassis wire , and the 10 ga. wire being used to extend the chassis wire.
(E)join the wires however you see fit, then tape up the connection. then run the wire the length of the harness stretching across the core support ,and let it chill with the other wires your tossed over.
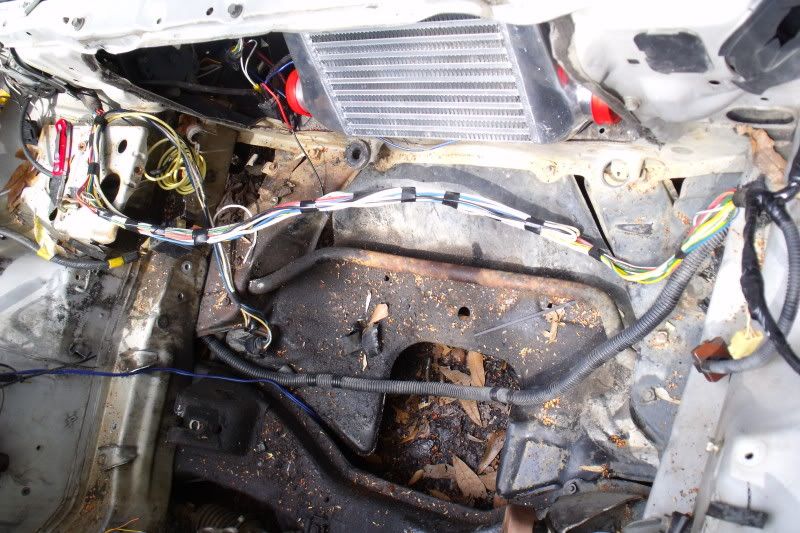
(F)use small pieces of tape , and "scab" your loom together to keep stray wires from running abroad.
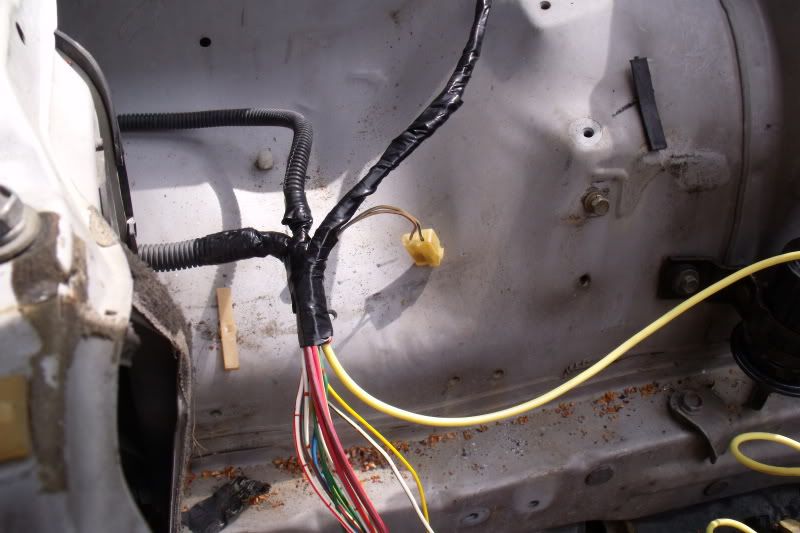
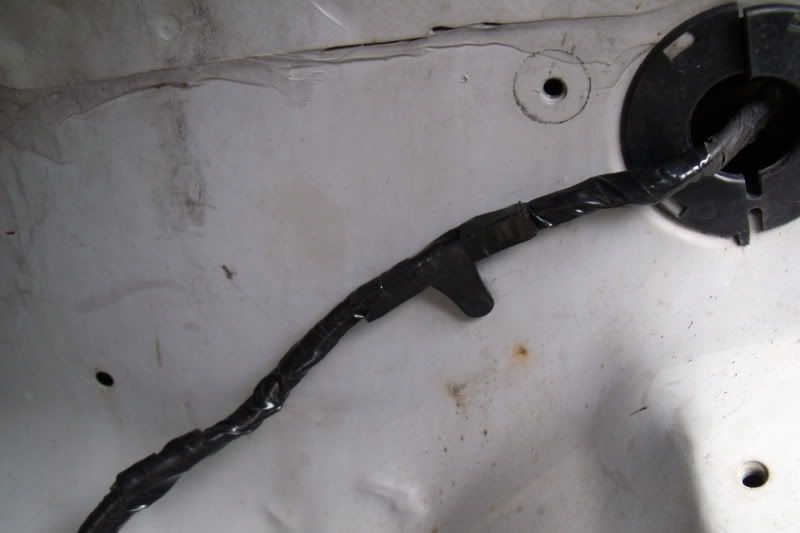
(G)here alot of people will cut the harness, but the way i see it...why? why spend the extra time cutting, joining , taping, and hoping the connections are good? ill be running my alt. connection harness under the battery tray to connect to the alt. once the engine is in place. i gave myself about 2.5-3' of wire here, for comfort. so i just looped the access back with the original harness.
(H) once again "scab" the harness with little pieces of tape here to keep things from getting messy.
(I) now join the new 10 ga. wire you just ran across the core support to the other end of that 12 ga. original wire that you cut off earlier, on the alt. plug.
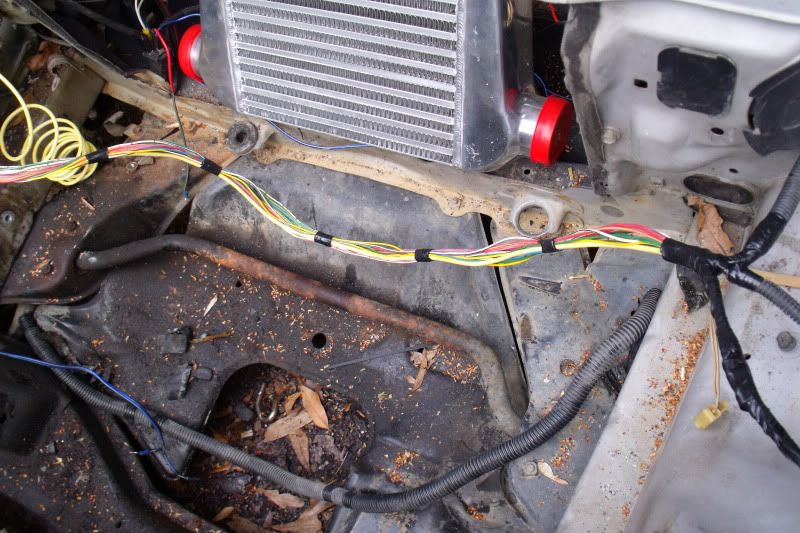
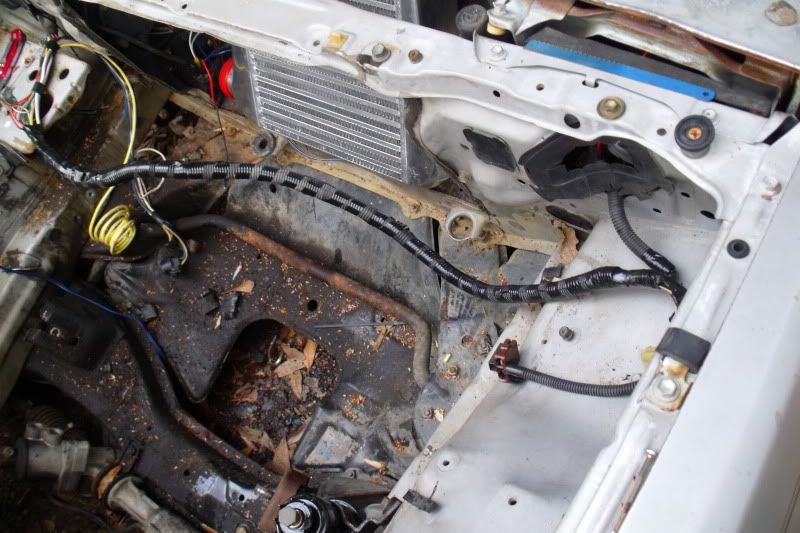
(J)put the loom plastic back on , and tape everything back up like it was. yes you will use almost a whole roll of electrical tape doing just this little section of instruction.
(K) remember those clips earlier you removed , i told you to save? put them back on the harness now......and snap them in theyre corresponding seats.
your done, wasnt that simple , just time consuming? no , not done with the harness, just done with this part. your harness should now be back in the same spot where you started, with the exception of the alt. harness is now in its new location.
first i must post these links , they are ever so helpful in this:
http://club4ag.com/technical_main.htm (4agze ae101/ae92 ecu pinouts) this will give you reference to what abreviasions stand for.
http://forums.club4ag.com/zerothread?id=76514 this guy clears alot of things up as well.
the basics of a toyota harness is this....
blk/red wires -usually these are main 12v supply constants to almost all remote sensors ie: ont he 4agze they go to things like the s/c clutch, vsv's, cts, ecu, clod start inj. and some accesory's , etc. this wire is energized in the "on" position of the ignition.
blk/orn wires- main 12v constant switched with ignition for injectors , coils, etc. this wire is energized in the "on" position in the ignition.
thick blk/wht wires- is a switched 12v signal wire only live when the ignition is is in the "start" position. it feeds juice to the starter sylinoid , STA on the ecu, etc.
thick wht wires -always associated with the battery direct and charging systems.
yel/blk wire - on the chassis side is almost always oil pressure to your cluster
yel/grn wire - on the chassis side is almost always water temp to your cluster
when dealing with the body/chassis lighting:
green wire - positve 12v
wht/blk - ground/ sometimes a switched ground.
seriously , you couldnt choose an easier chassis to swap an engine into. why you ask? a few simple reasons....
-that electronic speed sending unit for the more modern engines..............your tranny is cable driven right to the speedo=]
-tight fit...............yeah right not in ae86
-motor mounts........sure , what do you put in there?
-that newer model engine with the mystery split wires from the alt. and charging system.......your ae86 charging system is part of the chassis.
-relays for fuel pump, circuit opening relays, etc................yeah theyre part of the ae86 chassis already, just tap into them.
-stretching that harness to fit......nope with umpteen wholes in the firewall, where you wanna run it through?
so ill start with the simplest things and work from there....
1st off, when swapping to a gze, your alternator is going to be on the other side of the engine bay. you look at your engine bay and you see this harness stretched across the radiator core support , and you think "hmmmmm.....this is gonna SUCK!!" slow down, its actually a cake walk.
(A)

(B)

(C)

(D)

(E)

23. (A) you atart with this plug on the passenger side of the chassis.
(B) remove the crusty old electrical tape, and looming cover
(C)(D)further remove the chassis clips that hold the harness to the car, save these, youll need them later.
(E) continue unwrapping the looming, and removing clips across the whole radiator core support , to the other side of the car , including the "L" shaped harness jacket , that mounts to the core support.
(A)

(B)

(C)

(D)

(E)

(F)

(G)

(H)

(I)

(J)


(K)


24. (A) note the smaller white wire (12 ga.) on the left side of my finger, this wire runs through the fender well, and not back to the fuse box. cut this wire , with reasonable length to add wire on to. (4-5")
(B)once that single wire is cut loose you can basically see the simplicity of how the other charge wires are ran back to the other side of the car near the fuse box. throw these wires towards the driver side of the car, and leave them.
(C) althought the wire is 12 gauge on the car , ill be running 10 gauge wire to help compensate the distance ill be extending this wire to the other side.
(D)strip the wire back on the original chassis wire , and the 10 ga. wire being used to extend the chassis wire.
(E)join the wires however you see fit, then tape up the connection. then run the wire the length of the harness stretching across the core support ,and let it chill with the other wires your tossed over.
(F)use small pieces of tape , and "scab" your loom together to keep stray wires from running abroad.
(G)here alot of people will cut the harness, but the way i see it...why? why spend the extra time cutting, joining , taping, and hoping the connections are good? ill be running my alt. connection harness under the battery tray to connect to the alt. once the engine is in place. i gave myself about 2.5-3' of wire here, for comfort. so i just looped the access back with the original harness.
(H) once again "scab" the harness with little pieces of tape here to keep things from getting messy.
(I) now join the new 10 ga. wire you just ran across the core support to the other end of that 12 ga. original wire that you cut off earlier, on the alt. plug.
(J)put the loom plastic back on , and tape everything back up like it was. yes you will use almost a whole roll of electrical tape doing just this little section of instruction.
(K) remember those clips earlier you removed , i told you to save? put them back on the harness now......and snap them in theyre corresponding seats.
your done, wasnt that simple , just time consuming? no , not done with the harness, just done with this part. your harness should now be back in the same spot where you started, with the exception of the alt. harness is now in its new location.

706-669-6578 EST
Re: DIY: swapping an AE92 4AGZE into a zenki AE86 GT-S
now we play with the gze harness....
first order of business is the gze's stock location of the o2 sensor wire on the harness. it comes out on the , what is now "front" or belt side of the engine. this aint gonna work. your header is on the other side of the engine bay , and it stays there unlike the FWD configuration.
this is your stock ae92 gze harness.....o2 sensor and loom are laid laid out in the 10:30/11:00 position.
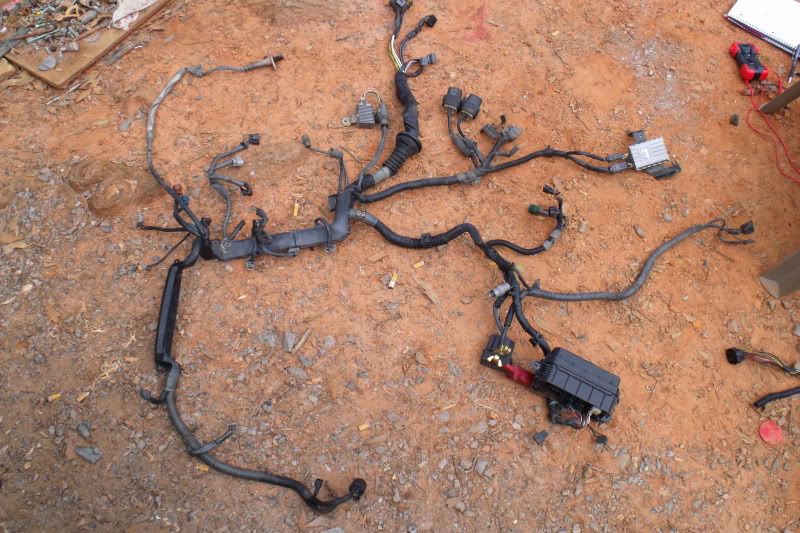
same goes here that you did to the chassis harness. untape, snap plastic wire shroud off, and pull the o2 sensor wires back to the pigtail that runs to the ecu. snap plastic shroud back on, retape , and done.
here you see the harness laid out in the same fasion now with the o2 sensor wires in the 3 o clock position.
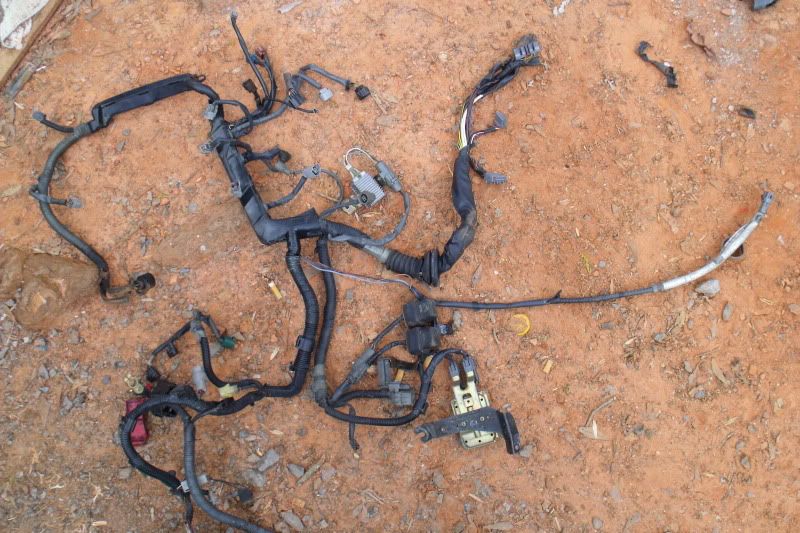
*NOTE: if you plan on mounting your coil pack in a different loction , this is the time to move the wires.
first order of business is the gze's stock location of the o2 sensor wire on the harness. it comes out on the , what is now "front" or belt side of the engine. this aint gonna work. your header is on the other side of the engine bay , and it stays there unlike the FWD configuration.
this is your stock ae92 gze harness.....o2 sensor and loom are laid laid out in the 10:30/11:00 position.

same goes here that you did to the chassis harness. untape, snap plastic wire shroud off, and pull the o2 sensor wires back to the pigtail that runs to the ecu. snap plastic shroud back on, retape , and done.
here you see the harness laid out in the same fasion now with the o2 sensor wires in the 3 o clock position.

*NOTE: if you plan on mounting your coil pack in a different loction , this is the time to move the wires.

706-669-6578 EST
Re: DIY: swapping an AE92 4AGZE into a zenki AE86 GT-S
on the firewall of your ae86 gts youll find a 12 pin connector..... it looks like this:
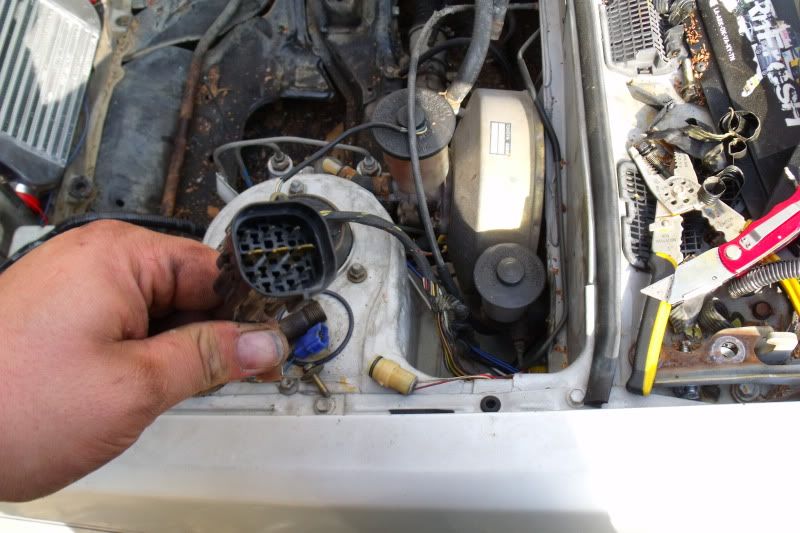
loomed with this connector is the brake master cylinder fluid level indicator....untape the harness as far back as you can from the 2 wires that go to the level indicator all the way back to the firewall. unplug the brakes fluid level indicator, and now shove this 12 pin connector and indicator plug, and loom back through the firewall to the inside of the car. once the loom and both plugs are in the car , send the level indicator plug back out of the whole and plug into the level indicator. you should have enough wire un taped from the loom to do this. now it should look like this:
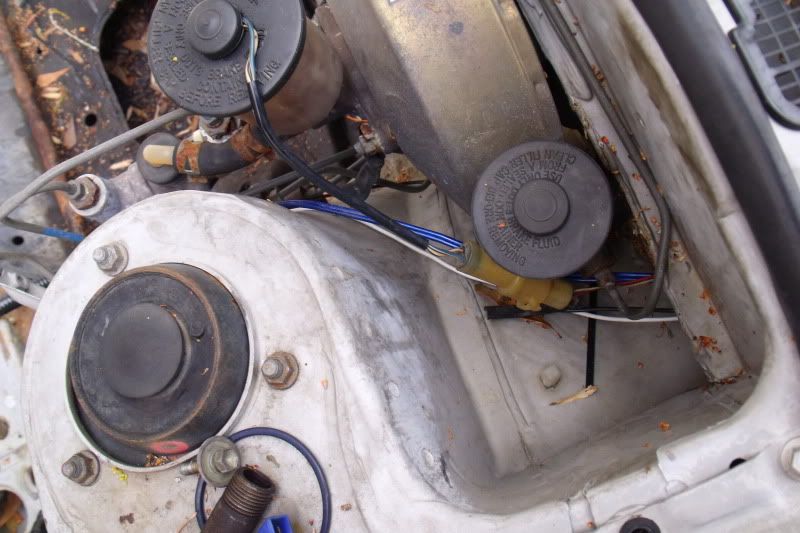
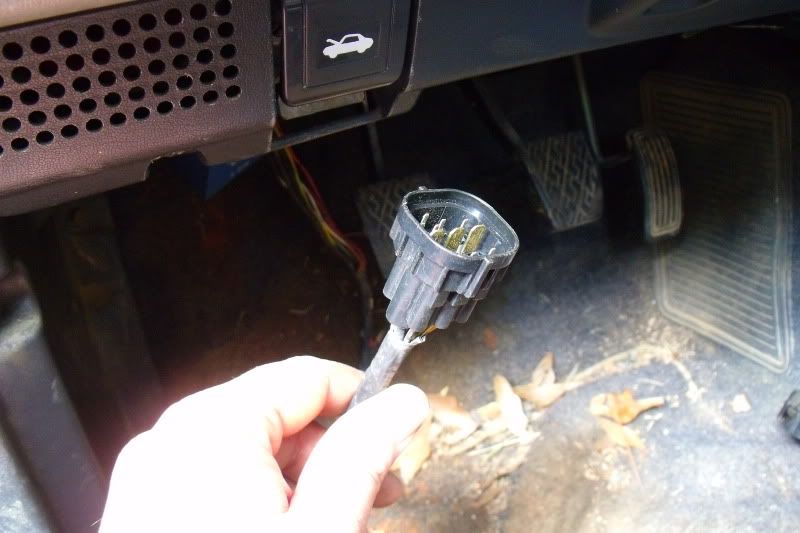

loomed with this connector is the brake master cylinder fluid level indicator....untape the harness as far back as you can from the 2 wires that go to the level indicator all the way back to the firewall. unplug the brakes fluid level indicator, and now shove this 12 pin connector and indicator plug, and loom back through the firewall to the inside of the car. once the loom and both plugs are in the car , send the level indicator plug back out of the whole and plug into the level indicator. you should have enough wire un taped from the loom to do this. now it should look like this:


706-669-6578 EST
Re: DIY: swapping an AE92 4AGZE into a zenki AE86 GT-S
okay quick rundown of the 12 pin connector....ones you need to know anyway....
Yellow/green - Coolant temp
Yellow/black - Oil pressure
Black/white - Starter solenoid
Black/orange - Ignition supply to coil etc.
Red/black - Reverse light switch
Red/blue - Reverse light switch
Black - tachometer
white/b.blue - A/C
white - A/C
once the wires are on the passenger floor board , locate your reverse light switch wires...one is red/blue the other is red/black. run these 2 wires under the center radio plastic , and centerconsole , and run them out the transmission shifter hole, under the shifter boot plate.
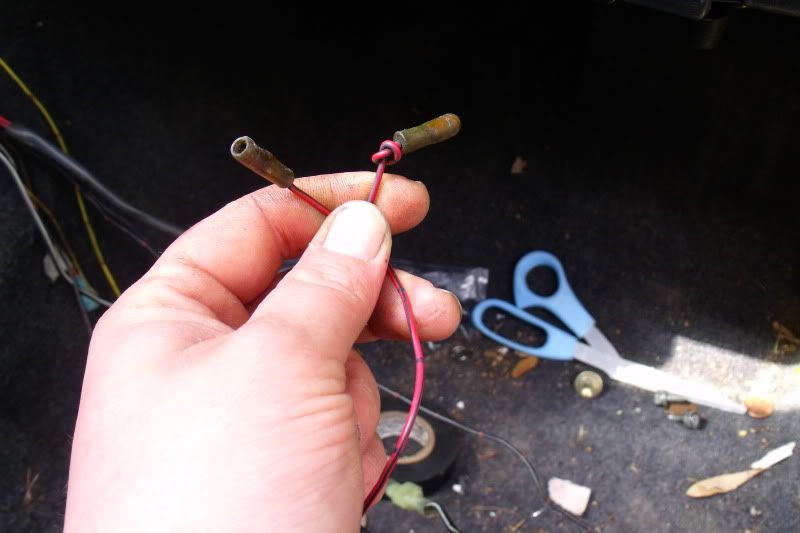
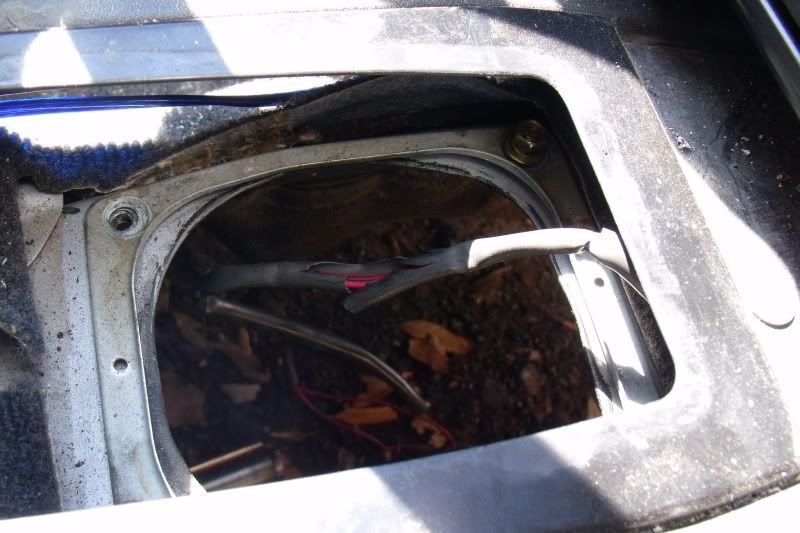
this is an easy way to route the wires without having to extend the harness back outside into the engine bay, just to go under the tranny tunnel.
Yellow/green - Coolant temp
Yellow/black - Oil pressure
Black/white - Starter solenoid
Black/orange - Ignition supply to coil etc.
Red/black - Reverse light switch
Red/blue - Reverse light switch
Black - tachometer
white/b.blue - A/C
white - A/C
once the wires are on the passenger floor board , locate your reverse light switch wires...one is red/blue the other is red/black. run these 2 wires under the center radio plastic , and centerconsole , and run them out the transmission shifter hole, under the shifter boot plate.


this is an easy way to route the wires without having to extend the harness back outside into the engine bay, just to go under the tranny tunnel.

706-669-6578 EST
Re: DIY: swapping an AE92 4AGZE into a zenki AE86 GT-S
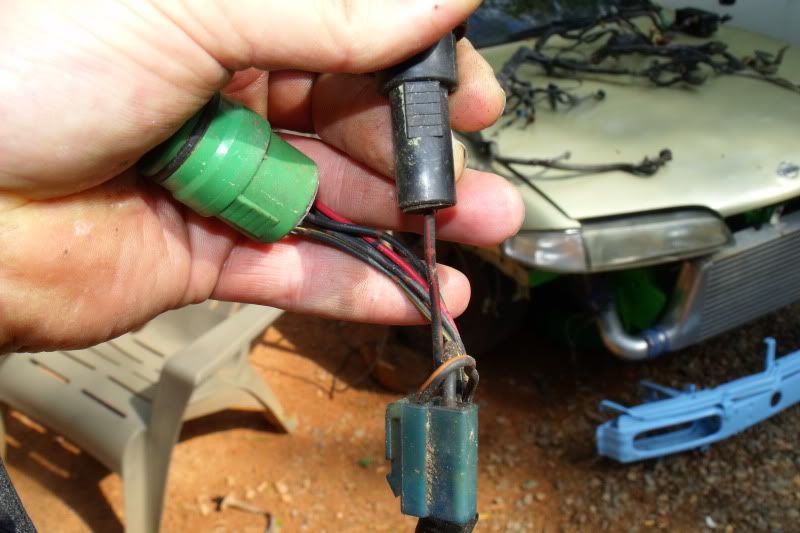
under the ae86's fuse box , there is a black plug with a black/red wire.....V
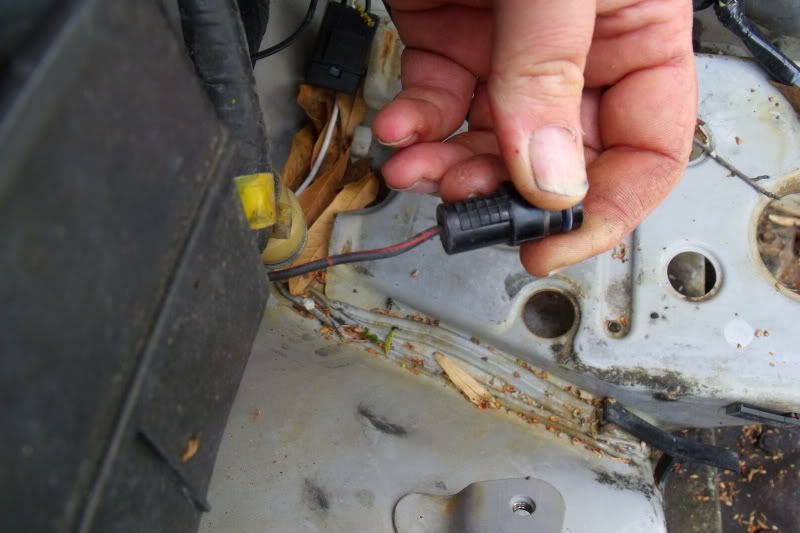
this wire connected to the old harness here......V
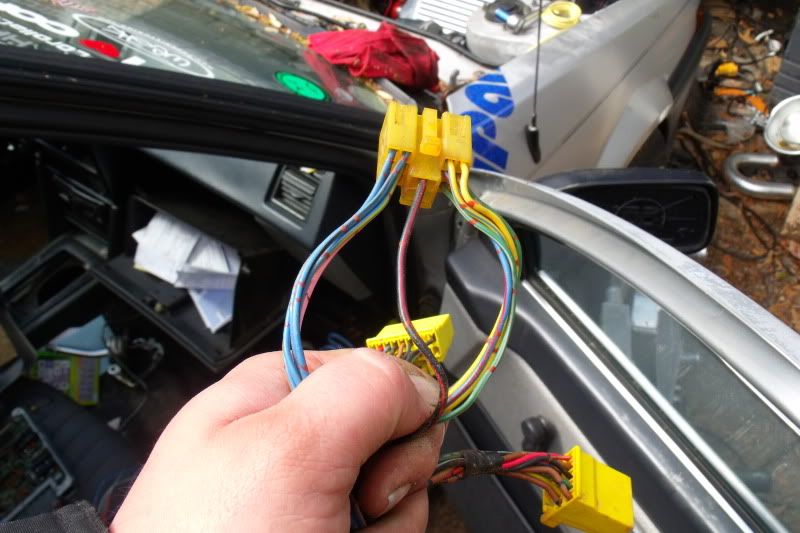
this wire in turn runs through the old harness, and comes out in the passenger floor board area on this plug....V
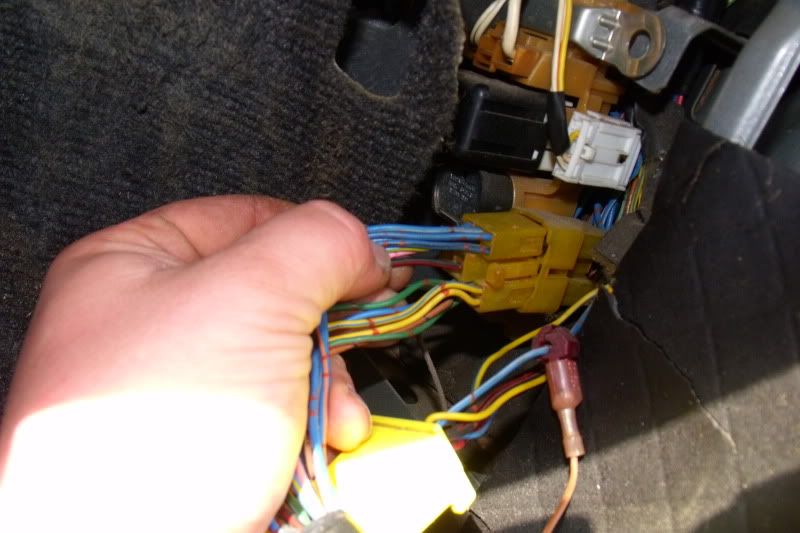
this plug , plugs into the junction/relay box in the passenger kick panel here....V
the black/red wire then runs to the old ecu's 14 pin connector (the 2 black/red wires on closest end)......V
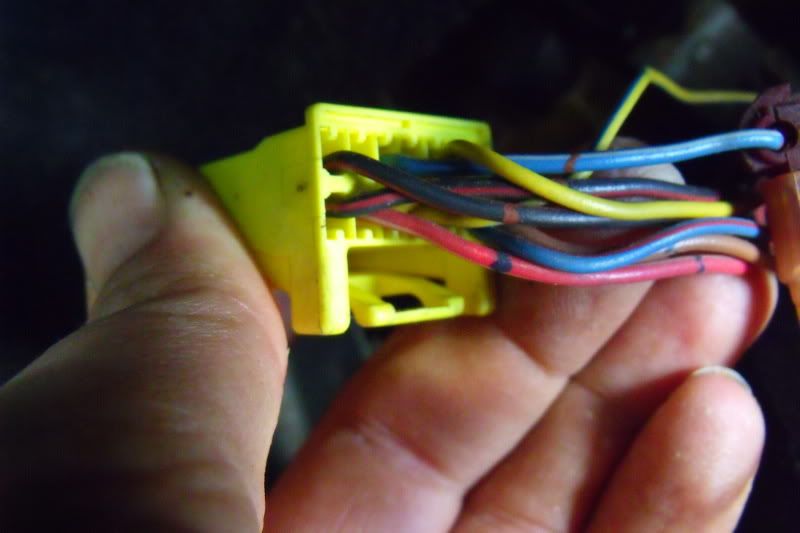
in the old ecu , these wires run to "+B" AND "+B1", on the gze 22 pin connector those are these 2 wires again black/red here...V
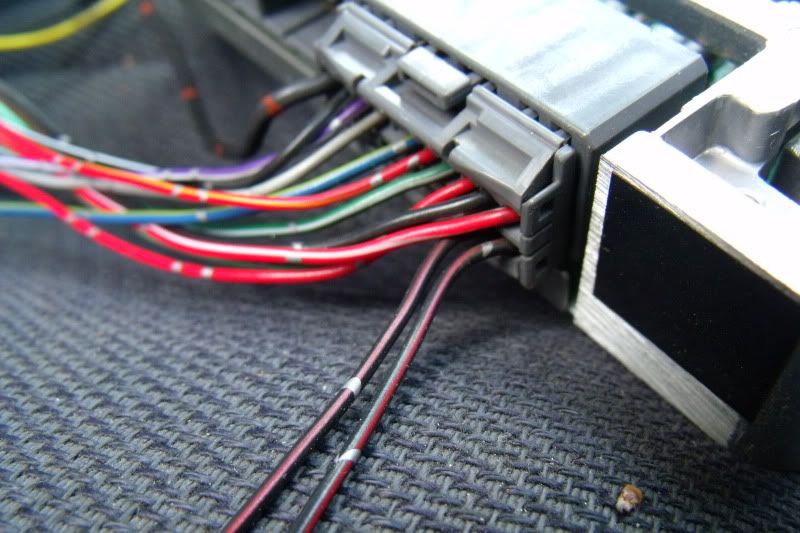
so basically cut the 2 black/red wires loose from the old 14 pin ecu connector , and join them (wires from the chassis) to the 2 black/red wires on the 22 pin gze ecu plug. to make sure you have the right wires , plug the 22 pin gze ecu connector into the gze ecu , and make sure the 2 black/red wires are going to +B and +B1...V
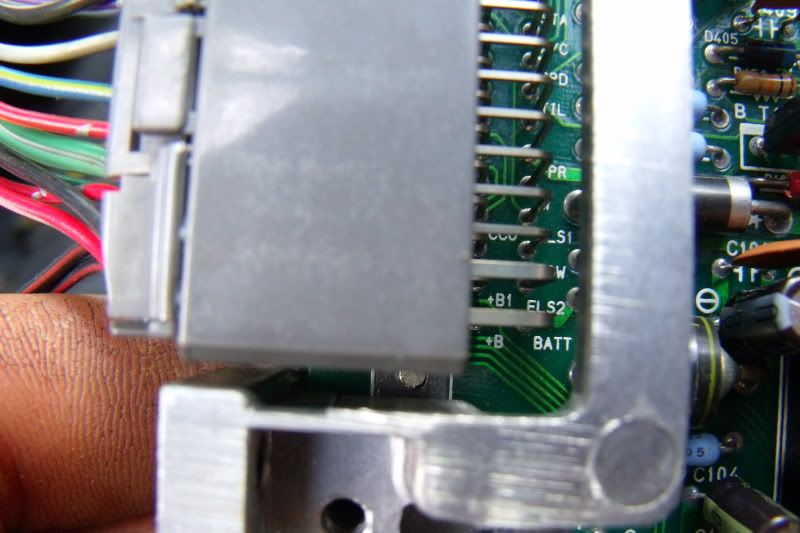
+B - EFI main relay
+B1 -EFI main relay
now that we have it connected at the ecu side, we got to get it connected on the fuse box side of the chassis to get power to the passenger kick panel.
on the same old ecu 14 pin connector , youll find a red/white wire. this wire supplies 12v constant to the ecu from the battery. cut this wire from the old ecu plug, and connect it to the gze 22 pin ecu connector to give your gze ecu a 12v constant.....V
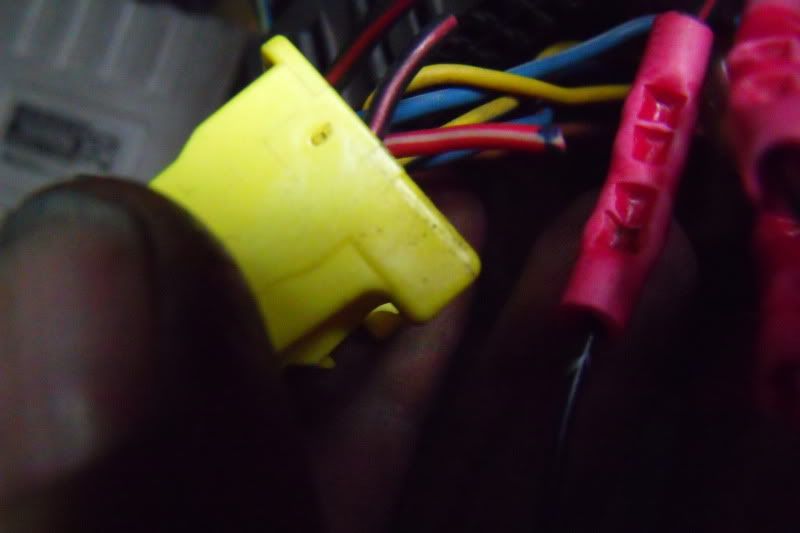
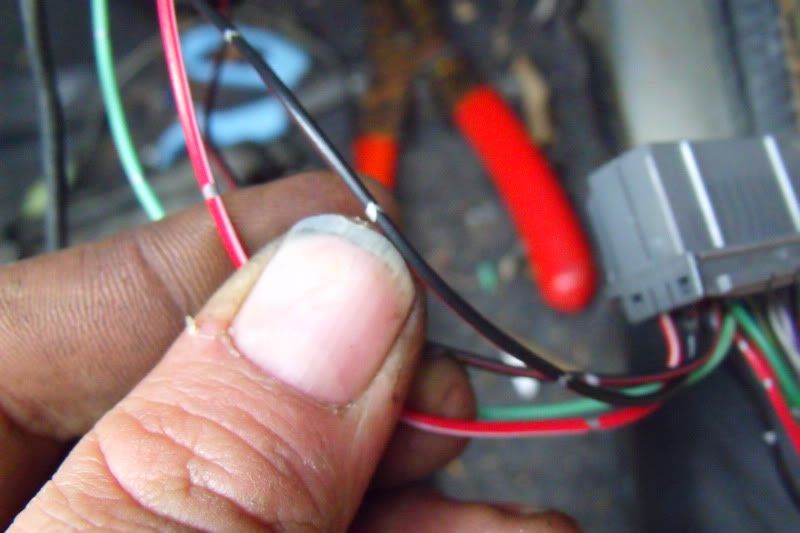

this wire connected to the old harness here......V

this wire in turn runs through the old harness, and comes out in the passenger floor board area on this plug....V

this plug , plugs into the junction/relay box in the passenger kick panel here....V

the black/red wire then runs to the old ecu's 14 pin connector (the 2 black/red wires on closest end)......V

in the old ecu , these wires run to "+B" AND "+B1", on the gze 22 pin connector those are these 2 wires again black/red here...V

so basically cut the 2 black/red wires loose from the old 14 pin ecu connector , and join them (wires from the chassis) to the 2 black/red wires on the 22 pin gze ecu plug. to make sure you have the right wires , plug the 22 pin gze ecu connector into the gze ecu , and make sure the 2 black/red wires are going to +B and +B1...V

+B - EFI main relay
+B1 -EFI main relay
now that we have it connected at the ecu side, we got to get it connected on the fuse box side of the chassis to get power to the passenger kick panel.
on the same old ecu 14 pin connector , youll find a red/white wire. this wire supplies 12v constant to the ecu from the battery. cut this wire from the old ecu plug, and connect it to the gze 22 pin ecu connector to give your gze ecu a 12v constant.....V


706-669-6578 EST
Re: DIY: swapping an AE92 4AGZE into a zenki AE86 GT-S
okay, so were gonna get power to the passenger side kick panel, and all of the sensors and such on the engine. ive already showed you the plug, and the trace of how the wire flows. now were gonna replicate that wire, keep the factory plug in the kick panel and retain our wipers.
so going back to this plug........V
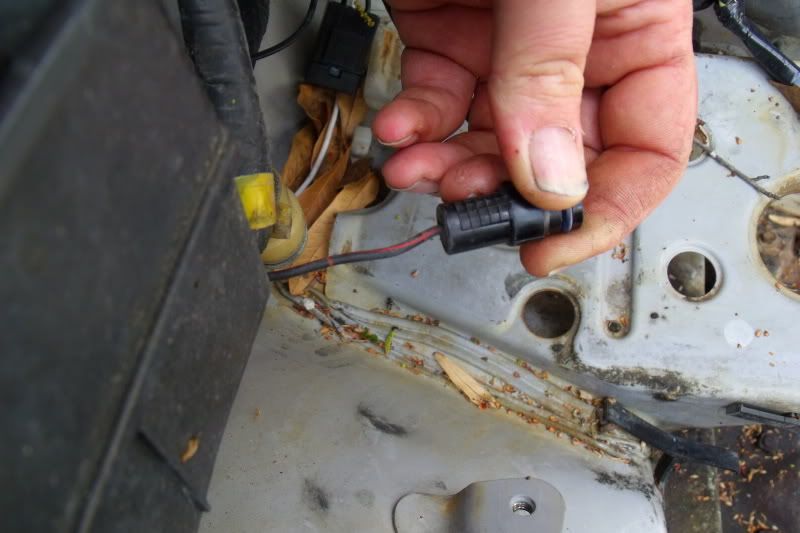
again , luckily i have the other end plug in from another harness.....V
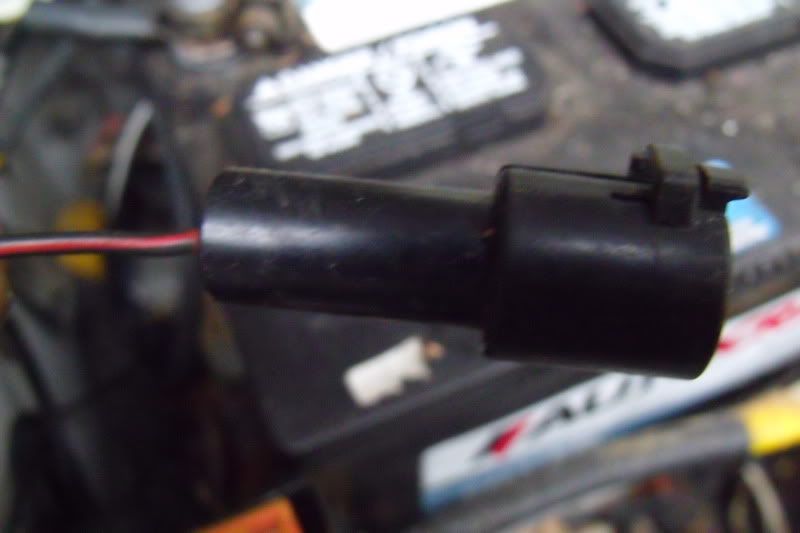
taking my roll of 10ga. wire, i run it into the driver side fender well hole right next to the battery.....v
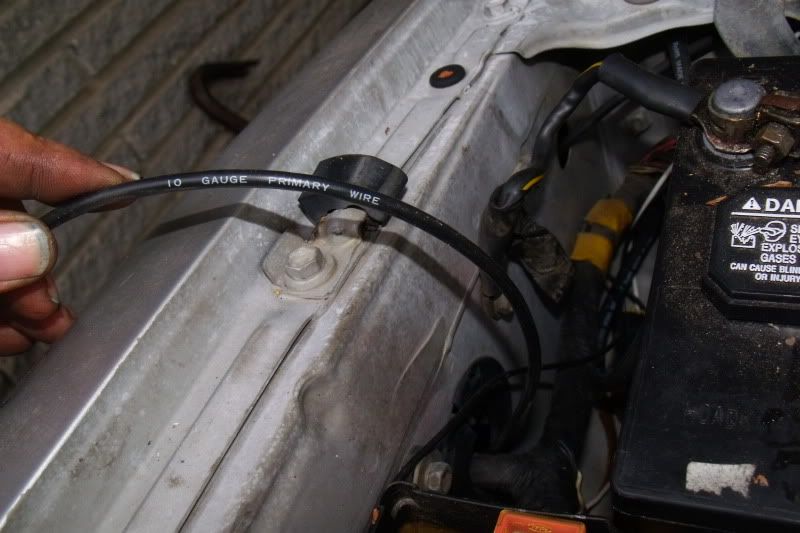
then bring it out of the fender well hole right next to the master cylinder.....V
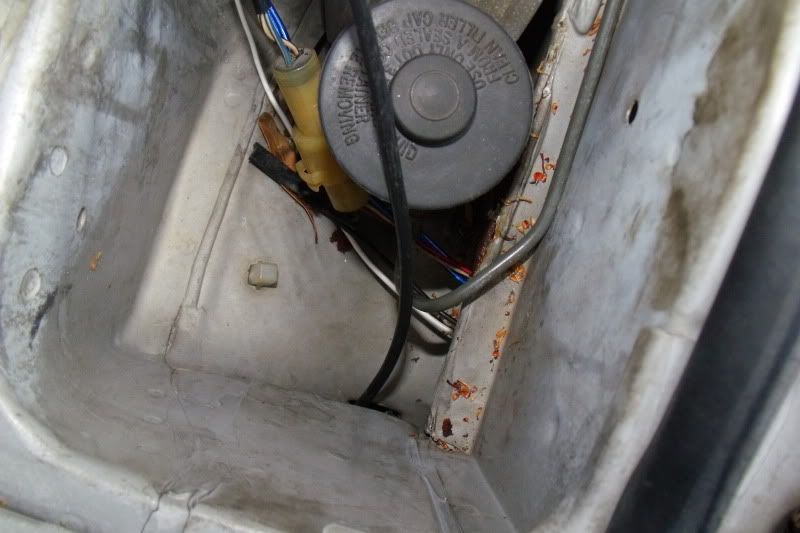
then run it into the same hole we pushed the twelve pin connector thru .....V
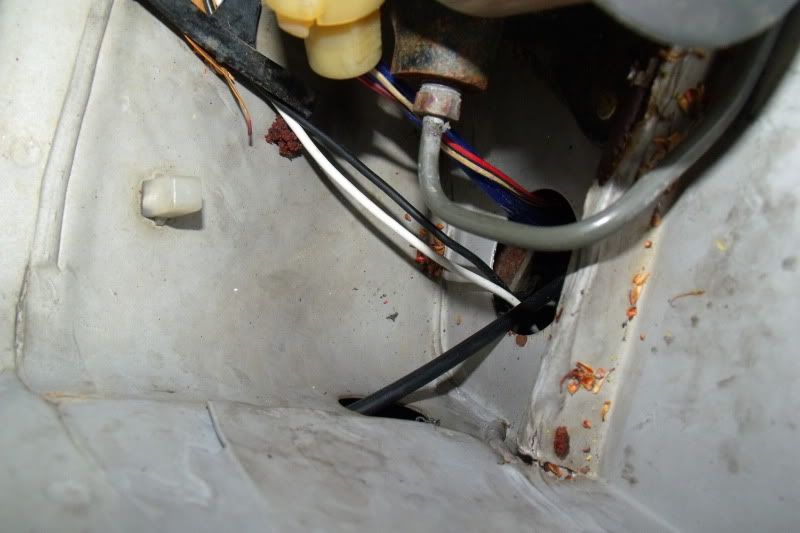
once its inside the car, run it along the same path we ran the 12 pin connector wire (ie: behind the radio into the passenger floorboard) once in the passenger floor board your gonna cut this black/red wire in the center of this plug from the old gt-s harness......V

also coming in off of the gze engine harness theres 2 wires black/red stripe going to the gze engine harnesses circuit opening relay plug. cut this wire shown, ( the thinner of the 2)and just to be sure you have the right wire , pull the iscv plug off of the iscv on the gze in the engine bay , and the center wire will be black/red stripe, test continuity between this wire on the plug in the engine bay , and the gze circuit opening relay plug wire im showing here.....V
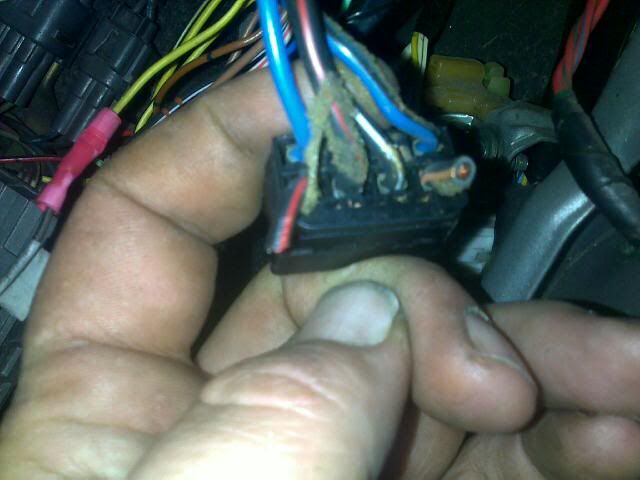
once youve i dentified the correct wire, you will notice that if you keep one test lead on the black/red wire under the dash , you can touch any black/red wire on the engine sensors (that have the black/red) and get continuity. once youve made sure you have the correct wire under the dash , extend it about 7"-8".
okay remember our own 10ga. wire we ran earlier from the ae86 fuse box? now were gonna do a "Y" connector. meaning , were gonna connect the black/red wire from the ae86 kick panel plug, and the gze black/red wire we just verified, and joint the 2 black/red wires together. now were gonna joint the black/red wires with the single 10ga. wire weve ran from the fuse box....something like this.....V
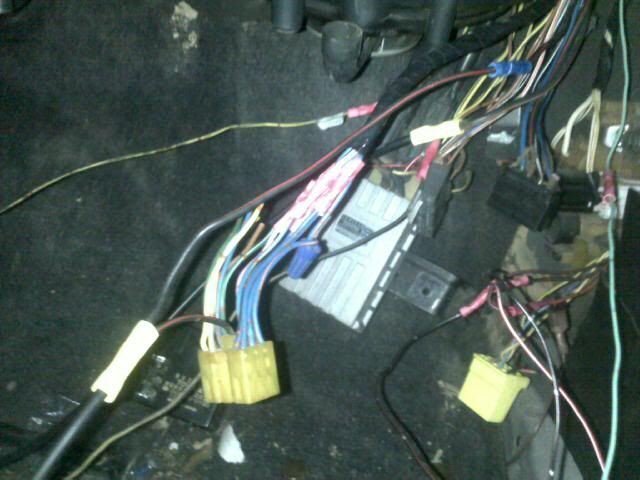
okay, so by doing this, we now send 12v to the gze ecu, ae86 chassis accesories, and all gze engine sensors when the ignition is in the "on" or "run" position.
on the 12 pin connector we ran thru the firewall , theres a thick black/white wire. you wanna run this back out into the engine bay and connect it to the starter signal wire, this is what feeds your starter the signal to kick the sylinoid.
also on the 12 pin connector weve ran through the firewall into the floor board , you will find a black/orange wire.
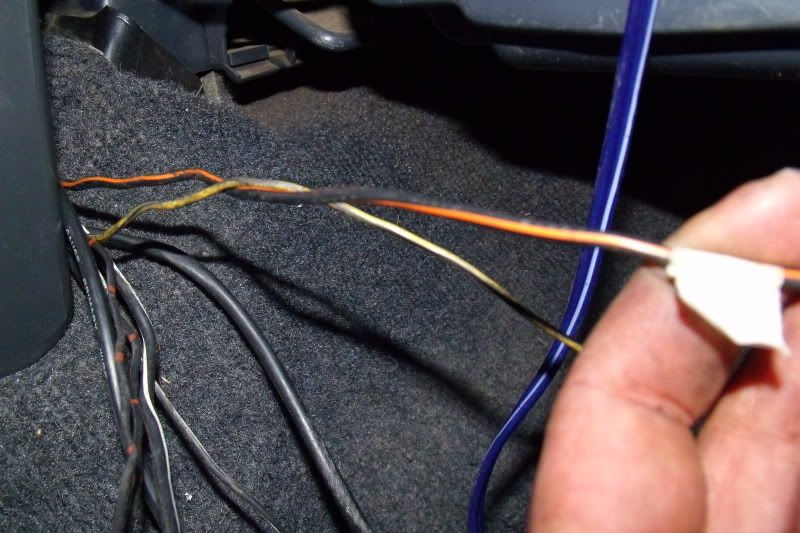
on the gze harness, the same 4agze COR plug that the black/red wire is on , you will find a black/orange wire.
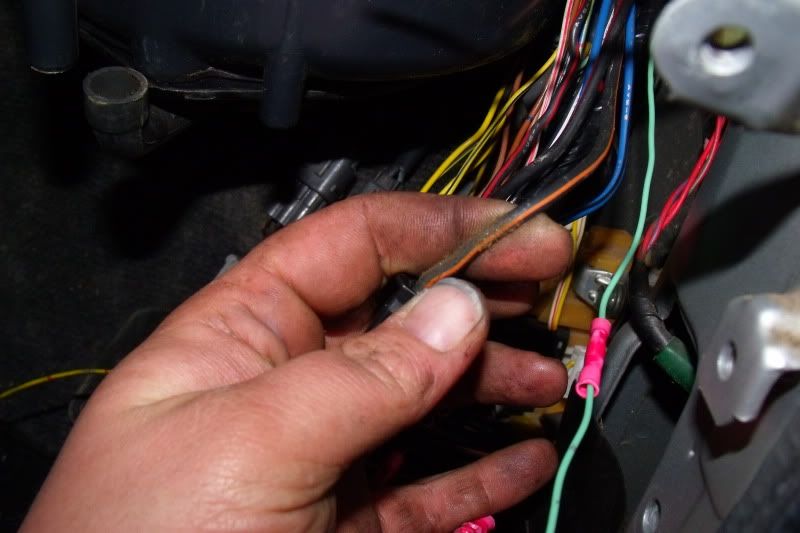
this wire sends power to the 4agze coil packs, the ignitor, and injectors. connect the black/orange wire from the 12 pin connector to the black/orange wire on the 4agze COR plug. this will now energize the above accessories when the ignition switch is in the "on" or "run" position.
so going back to this plug........V

again , luckily i have the other end plug in from another harness.....V

taking my roll of 10ga. wire, i run it into the driver side fender well hole right next to the battery.....v

then bring it out of the fender well hole right next to the master cylinder.....V

then run it into the same hole we pushed the twelve pin connector thru .....V

once its inside the car, run it along the same path we ran the 12 pin connector wire (ie: behind the radio into the passenger floorboard) once in the passenger floor board your gonna cut this black/red wire in the center of this plug from the old gt-s harness......V

also coming in off of the gze engine harness theres 2 wires black/red stripe going to the gze engine harnesses circuit opening relay plug. cut this wire shown, ( the thinner of the 2)and just to be sure you have the right wire , pull the iscv plug off of the iscv on the gze in the engine bay , and the center wire will be black/red stripe, test continuity between this wire on the plug in the engine bay , and the gze circuit opening relay plug wire im showing here.....V

once youve i dentified the correct wire, you will notice that if you keep one test lead on the black/red wire under the dash , you can touch any black/red wire on the engine sensors (that have the black/red) and get continuity. once youve made sure you have the correct wire under the dash , extend it about 7"-8".
okay remember our own 10ga. wire we ran earlier from the ae86 fuse box? now were gonna do a "Y" connector. meaning , were gonna connect the black/red wire from the ae86 kick panel plug, and the gze black/red wire we just verified, and joint the 2 black/red wires together. now were gonna joint the black/red wires with the single 10ga. wire weve ran from the fuse box....something like this.....V

okay, so by doing this, we now send 12v to the gze ecu, ae86 chassis accesories, and all gze engine sensors when the ignition is in the "on" or "run" position.
on the 12 pin connector we ran thru the firewall , theres a thick black/white wire. you wanna run this back out into the engine bay and connect it to the starter signal wire, this is what feeds your starter the signal to kick the sylinoid.
also on the 12 pin connector weve ran through the firewall into the floor board , you will find a black/orange wire.

on the gze harness, the same 4agze COR plug that the black/red wire is on , you will find a black/orange wire.

this wire sends power to the 4agze coil packs, the ignitor, and injectors. connect the black/orange wire from the 12 pin connector to the black/orange wire on the 4agze COR plug. this will now energize the above accessories when the ignition switch is in the "on" or "run" position.
Last edited by 4agshoob on Mon Apr 11, 2011 1:48 pm, edited 1 time in total.

706-669-6578 EST
Re: DIY: swapping an AE92 4AGZE into a zenki AE86 GT-S
wipers......
the power and control relay for the wipers come from the same plug we just connected a new wire to. look at your old gt-s harness , and find these plugs (they will be the closest to the ecu plugs, going down the harness) unravel the tape on the old harness to access the wires to these plugs, and youll notice they run back to the plug that connects in the passenger kick panel.......V
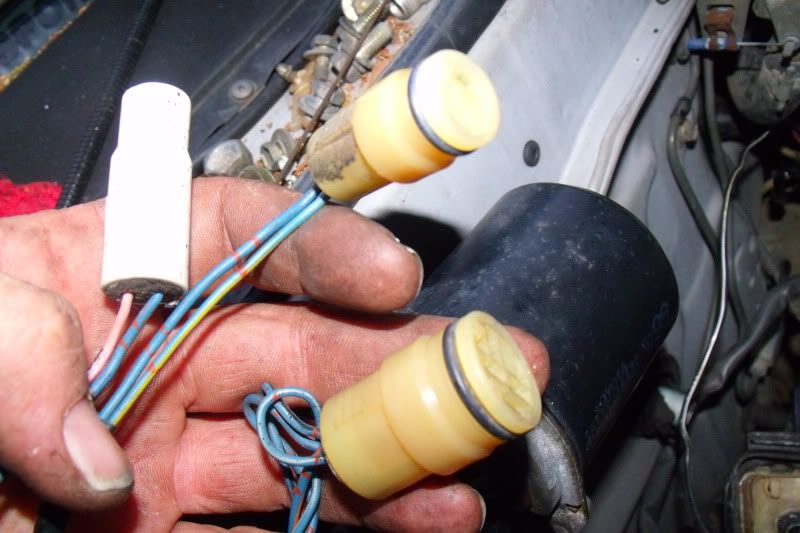
once youve pulled these 3 plugs and corresponding wires from your harness, tape them up together to make your own "harness". now youll notice you still have 6-7 wires still connected to the old gt-s harness, these can be cut free from the old gt-s harness, but cut with enough wire on the plug , to connect new wire.....V
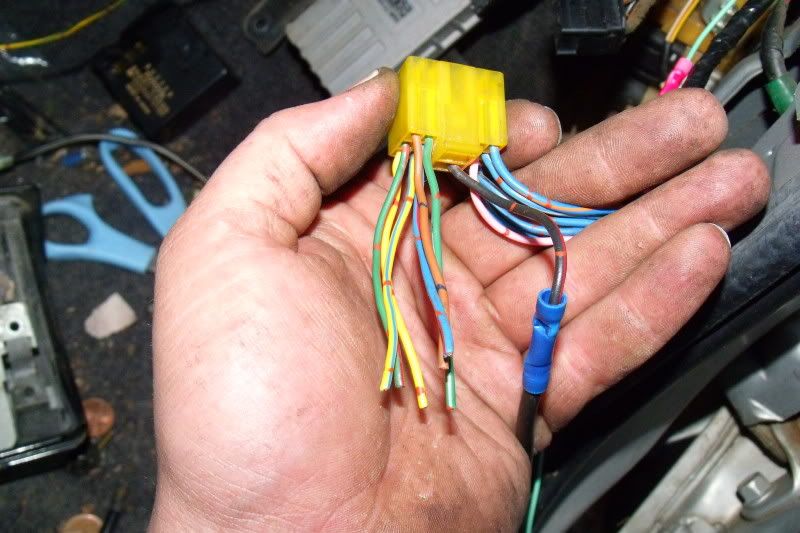
now , plug your wiper motor and washer pump motor back in. also plug the above connector plug, back into its position in the passenger kick panel....V

the power and control relay for the wipers come from the same plug we just connected a new wire to. look at your old gt-s harness , and find these plugs (they will be the closest to the ecu plugs, going down the harness) unravel the tape on the old harness to access the wires to these plugs, and youll notice they run back to the plug that connects in the passenger kick panel.......V

once youve pulled these 3 plugs and corresponding wires from your harness, tape them up together to make your own "harness". now youll notice you still have 6-7 wires still connected to the old gt-s harness, these can be cut free from the old gt-s harness, but cut with enough wire on the plug , to connect new wire.....V

now , plug your wiper motor and washer pump motor back in. also plug the above connector plug, back into its position in the passenger kick panel....V


706-669-6578 EST
Re: DIY: swapping an AE92 4AGZE into a zenki AE86 GT-S
now lets get a few of the guages working......
on the grey 22 pin interior connector on your gze harness (not the ecu connector) youll find a yellow/green wire.....V
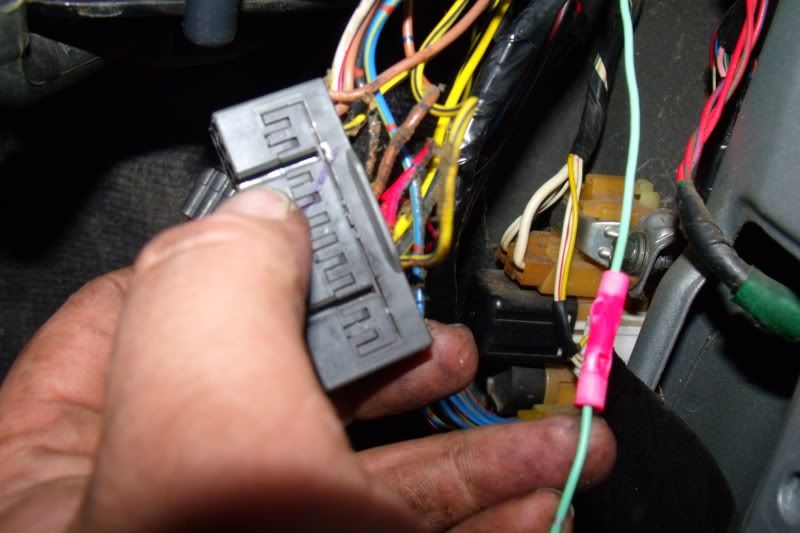
also on the 12 pin connector which we now have the wires from in the passenger floor board (coming from the chassis), you will find a yellow/green wire...V
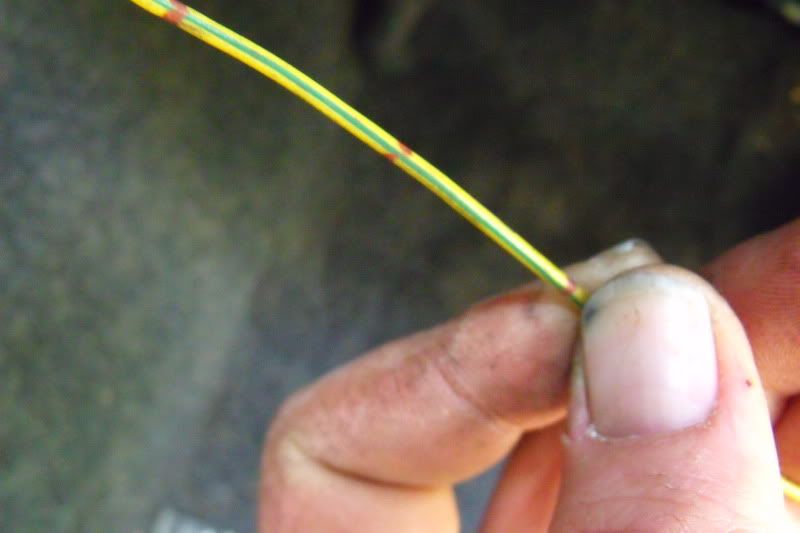
connect these 2 wires together , this will give you signal to your temp gauge in your gauge cluster.
also youll notice above i have a mint green wire connected to a mint green wire. on the 22 pin gze chassis plug this wire simply goes out to the ecu, via a longer route then back out to the enngine bay to the diagnostic connector. i eliminated the longer route , and just tied it in at the ecu. when completed , test continuity from this wire (CCO in the ECU) to the DIagnostic connector on the engine harness.
on the grey 22 pin interior connector on your gze harness (not the ecu connector) youll find a yellow/green wire.....V


also on the 12 pin connector which we now have the wires from in the passenger floor board (coming from the chassis), you will find a yellow/green wire...V

connect these 2 wires together , this will give you signal to your temp gauge in your gauge cluster.
also youll notice above i have a mint green wire connected to a mint green wire. on the 22 pin gze chassis plug this wire simply goes out to the ecu, via a longer route then back out to the enngine bay to the diagnostic connector. i eliminated the longer route , and just tied it in at the ecu. when completed , test continuity from this wire (CCO in the ECU) to the DIagnostic connector on the engine harness.

706-669-6578 EST